If you spend some time in front of your laptop camera capturing images or for normal video chats, you might have noticed that the image quality can be crappy sometimes. This makes you wonder how to improve laptop camera quality.
Laptop camera quality is determined by three things: your camera, environment and imaging software you are using. Before you give up on the quest to better camera quality, there are a couple of things you can do to improve the situation.
Of course, it wouldn’t be realistic to expect an image quality that is similar to what you see in image software commercials, but you can make your chats and videos look better. The tips mentioned here will bring you closer to a better experience.
8 Things You Can Do To Improve Laptop Camera Quality
Update your imaging software to the recent version
The quality of video chats you get is improved with newer versions. This means that if your copy is older, you’ll be stuck with crappy quality. This applies to most video chat programs.
Most web-based apps like Facebook Chat and Google Chat stay updated. However, it doesn’t hurt to regularly check if there are any updates or new add-ons that will give you better quality.
Adjust the lighting condition
While this might seem like a small and obvious tweak, it can improve the image quality significantly. Lighting doesn’t have to be sophisticated, but it is necessary.

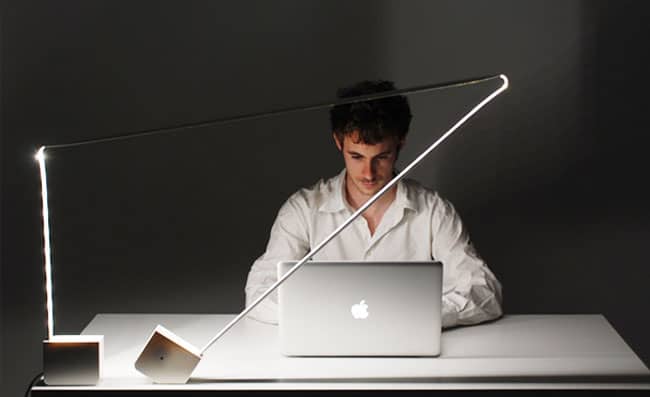
Ensure that you have a good source of light like a lamp placed behind the monitor. The lamp should point towards you and it’s critical to make sure that you don’t have a lot of light behind you.
Relying on your laptop screen as the sole source of light can distort your face color. A lamp will make the image color closer to how you look. Basically, the light makes the laptop camera lower its exposure settings resulting in a well-balanced image.
When using a laptop camera, adjust the lid to make sure the camera is at eye level. Ideally, it shouldn’t point to the floor or your ceiling light. Ideal lighting conditions can transform an image from a grainy silhouette into a real person.
We recommend this light:
- Eye-friendly LED Panel: 52 full spectrum beads with soft light, no flicker, no shadow, which avoids eye fatigue caused by flickering light and harsh glare effectively, desk lamp is ideal for reading,...
- 50 Adjustable Light Choices: LED desk lamp has 10 brightness levels and 5 lighting modes to choose, providing ideal light levels for working, studying, reading, and relaxing
- Touch control & memory function: Touch Sensor Switch is applied to this led table lamp. Memory function means you only need to set the brightness / color mode once you use this desk lamp, and desk...
- Stepless Dimming Mode: The desk light offers effortless switching of color temperatures (2700K-6500K) and stepless dimming (1% - 100%) to meet your arbitrary color temperature and brightness needs,...
- 360° Adjustable & Long Flexible Gooseneck: The long flexible gooseneck with 360° adjustable, easy adjustment to your preferred position, giving you full control over the direction of light. Our LED...
- Big Size & Fit Models: Our table lamp features a 17-inch extra-wide lamp bar that can fully light up your workspace, providing you with enough brightness to complete any task. It is suitable for a...
- BASIC AND VERSATILE: This desk lamp boasts a clean and modern design that seamlessly fits into any decor. Its neutral color and minimalist shape make it a timeless addition to your workspace.
- FLEXIBLE HOSENECK: The lamp's flexible hoseneck allows you to direct light exactly where you need it. Easily adjust the angle and height to optimize your lighting for reading, writing, studying, or...
- BULB REQUIREMENT: This desk lamp requires 1 x 60-Watt equivalent Type A medium base bulb, which is not included in your purchase.
Soften the light
Having a lamp may not be enough to improve laptop camera quality. You should consider softening the light so that it doesn’t appear too bright. You can soften the light by wrapping the lamp with a typing paper.
Alternatively, you can direct the light and bounce it off a nearby wall.
This prevents the light from reflecting from your eyes more so if you are wearing glasses. To make it more effective, adjust your screen so that light doesn’t reflect on your glasses.
Your Background matters
.. When using your laptop camera, you want to be the center of attention. However, you still need to be aware of your background …
When using your laptop camera, you want to be the center of attention. However, you still need to be aware of your background. Your audience has a keen eye for detail and inappropriate backgrounds can degrade the quality of the video or photo.
Make sure to clear out any item that makes the background appear cluttered or unkempt. You should be on the lookout for windows that may let in some light or reflect on the screen.
More often than not, settling for a plain wall for a background can eliminate this problem.
If you are in an area with lots of movement in the background, move to a better location.
Having too much motion in your shot makes the video application do more work resulting in a choppy video.
Don’t overload the laptop with multiple tasks
If you are watching videos on YouTube and downloading files simultaneously, the bandwidth available for Skype or other video chat software will shrink. Close all apps that you don’t really need, especially if they are eating into your bandwidth.
If there’s someone in your house engaging in internet-intensive tasks, this can also affect the quality you get on your video chats.
We recommend that you use Ethernet as opposed to Wi-Fi. While Wi-Fi is still a viable option, you are likely to experience some lags and unnecessary interferences making the video quite choppy. On the other hand, a wired internet will offer a consistent, smoother, and convenient experience.
Adjust your laptop camera video settings
Have you ever been on a video chat with someone and the focus zooms in and out or the exposure gets terrible? While this might not be catastrophic if you are having a casual video chat, you don’t want this to happen in the midst of a professional video chat or recording.
.. if you are having a casual video chat, you don’t want this to happen in the midst of a professional video chat or recording…
Almost all webcams let you adjust the contrast, brightness, and other aspects within the app settings. For instance, if you love using Skype, you can access the settings by clicking on Tools>Options>Video settings.
For the best results, drag the Setting window and place it sits next to Skype window. Now you can get a real-time video preview. Adjust the exposure, brightness, white balance, color, and any other settings until you are satisfied with how the video looks.
Remember to turn off automatic white balance and focus to prevent it from adjusting when filming.
If you choose to leave the auto white balance on, you have to optimize to what your laptop camera can capture. This feature works by using the brightest spot on the video frame as a benchmark to optimize the image quality.
Therefore, the top you are wearing will affect the image. We recommend that you wear a white top to balance the colors.
These tweaks might require a little playing around but it won’t be as effective as getting better lighting. However, this will be quite helpful if you need a quick fix but you can’t implement real-world permanent fixes.
If you have a router, set up the quality of service (QoS)
This will have a similar effect to closing online video games, BitTorrent and other programs that eat into the available bandwidth.Basically, this prioritizes video chatting by taking the available bandwidth away from other programs using the internet.
Essentially, it is similar to manually shut down the programs only that Quality of Service achieves this automatically.
It’s important to understand that not every router has this option. If you can’t see this setting on your router, you can still get this feature by installing DD-WRT software on the router.
Adjust the screen resolution
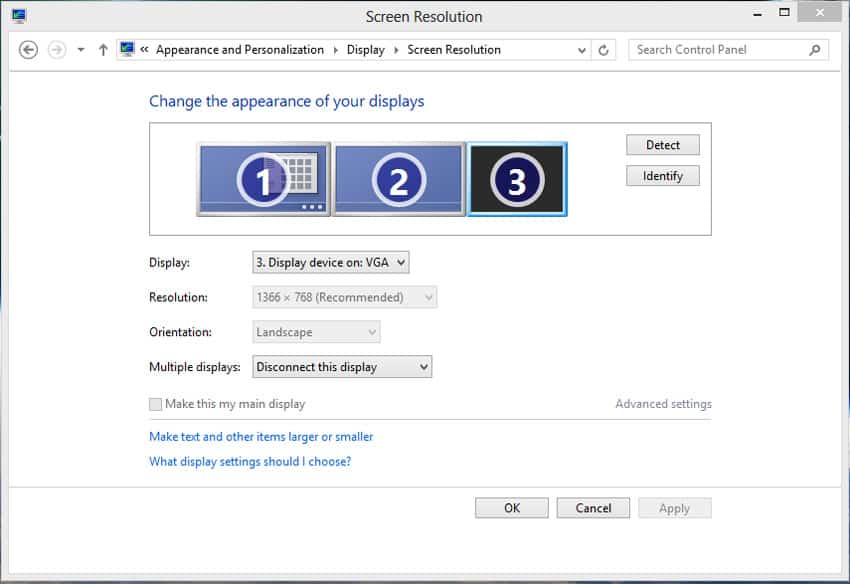
A blurred and distorted image quality that keeps distorting during a video call is annoying. But you can fix this by lowering the screen resolution to get a sharper image.
To achieve this, click on the Desktop > Properties > Screen Resolution and lower the resolution gradually and test the image quality until it gets better.

While the tweaks we’ve discussed so far can give you decent results, the internal webcam on your laptop might not be up to the task. Average video chats will work just fine but you might need to upgrade to a better webcam if you want to experience high-quality video recording.
If All Fails, Consider Invest In an External Webcam
Having an external webcam comes with many benefit, including better quality, noise canceling speaker & mic, adjustable viewing angle.
For this, we recommend you read our guide to the best webcam for video conferencing where we spend time testing over 30 products to give you the best for your need in 2024.
Or check out this featured products:
- Full Clarity: Look clearer in video calls with Full HD 1080p resolution
- Auto-Light Balance: RightLight boosts brightness by up to 50%, reducing shadows so you look your best—compared to previous-generation Logitech webcams (1)
- Privacy with a Slide: The integrated webcam cover makes it easy to get total, reliable privacy when you're not on a video call
- 【Full HD 1080P Webcam】Powered by a 1080p FHD two-MP CMOS, the NexiGo N60 Webcam produces exceptionally sharp and clear videos at resolutions up to 1920 x 1080 with 30fps. The 3.6mm glass lens...
- 【Zoom in and Out】With its fixed focal length lens, this webcam can capture high-definition video at a wide-angle of up to 110°, making it perfect for presentations. Moreover, you can adjust the...
- 【Built-in Noise-Cancelling Microphone】The built-in noise-canceling microphone reduces ambient noise to enhance the sound quality of your video. Great for Zoom / Facetime / Video Calling / OBS /...
- Webcam comes with a 3-month XSplit VCam license and no privacy shutter. XSplit VCam lets you remove, replace and blur your background without a Green Screen.
- Full HD 1080p video calling and recording at 30 fps - You’ll make a strong impression when it counts with crisp, clearly detailed and vibrantly colored video. Cable length: 1.5 m
- Stereo audio with dual mics - Capture natural sound on calls and recorded videos.
Conclusion
These tips will be handy when you are wondering how to improve laptop camera quality. While buying an advanced laptop, webcam, and signing up for a faster internet can fix the issues, you’ve got to try the methods here first.

Kenny Trinh is a seasoned expert in the field of laptops and technology, boasting an extensive background enriched by years of hands-on experience and in-depth research. With a keen eye for innovation and a passion for staying ahead of the technological curve, Kenny has established himself as a trusted voice in the tech community. Holding a prestigious degree in Computer Science, he combines his academic insights with practical expertise to deliver valuable insights and recommendations to his readers and followers. Through his work, Kenny aims to demystify complex tech concepts, empowering individuals to make informed decisions and optimize their digital experiences.


