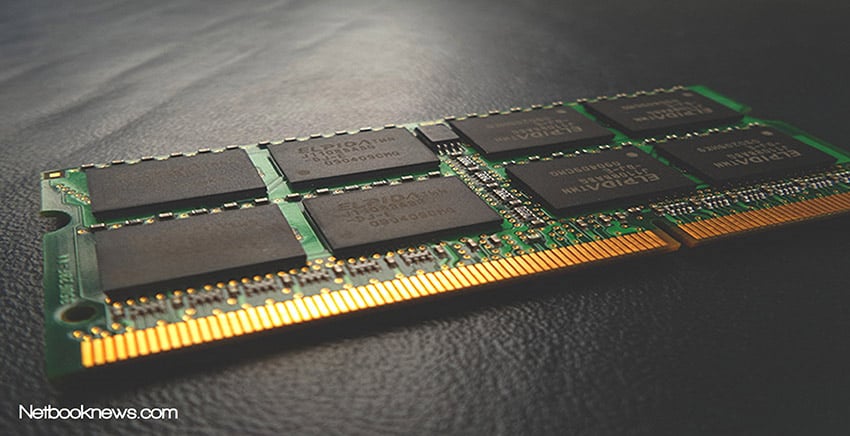
RAM or Random Access Memory is not cheap by any means these days. So if you’ve been looking to increase your RAM without actually buying some, here are some useful tips on how to increase RAM on laptop without buying.
RAM is the hardware component in your PC that is typically used to store data that is currently being used by your PC such as operating system files as well as open programs.
You can increase RAM by restarting your machine, remove unnecessary startup programs, frequently check for virus or malware. You can also allocate more ram if you are running a virtual machine.
There Is No Way To Download RAM!
Though before we continue we want to make this very clear that there is no way to “download” RAM, or increase RAM for free. No method will actually increase your RAM from 8GB to 16GB while having the same blistering read and write speeds unless you actually purchase more.
So be sure to not fall for any of those gimmick articles and applications that claim you can do such things. Most of the time they will install malicious software on your PC or try and steal your sensitive data.
We can’t tell you how many questions we see every day about people asking where they can download RAM. Our guide will only give you ways on how to clear up RAM or give your RAM a little boost so that leaves more usable RAM for your applications and workload.
How To Increase Ram Without Buying
Freeing up RAM on your laptop is a sure-fire way to boost the performance and day to day smoothness of your laptop. While it won’t technically increase the physical size of your RAM, it will increase the usable RAM you have access to for your day to day activities.
Restart Your Laptop
Restarting your PC can be a great way to clear up RAM. If you’re the sort of person who always hibernates their laptop instead of shutting it down. This method could seriously work for you as there’s no telling what applications are running in the background that you don’t even know about.
While this obviously won’t increase your RAM, it is a great way to flush it out. Remember to restart your laptop regularly, at least once a week so it doesn’t get too bogged down for no reason when you’re using it.
Close Unnecessary Applications
Some applications can be real memory hogs. Stuff like Google Chrome, Adobe applications will absolutely eat up your RAM even if their idling.
We’ve put together guides for both Windows and macOS on how to check which currently open applications are consuming the most memory
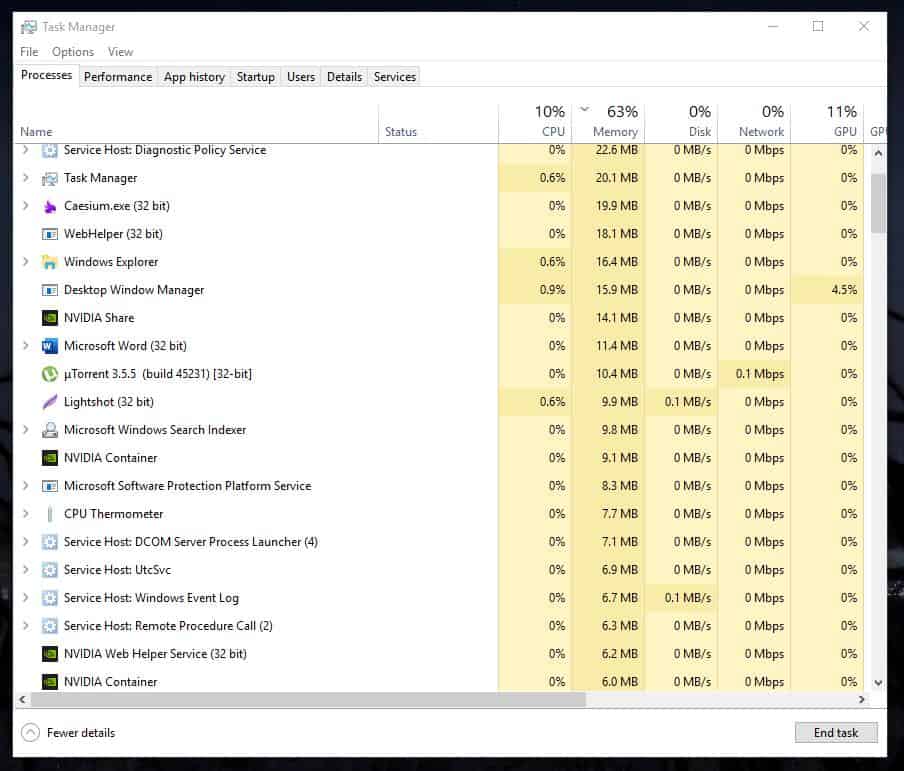
Close Task on Task Manager (Windows)
Step 1: Press the Ctrl + Shift + Esc keys together
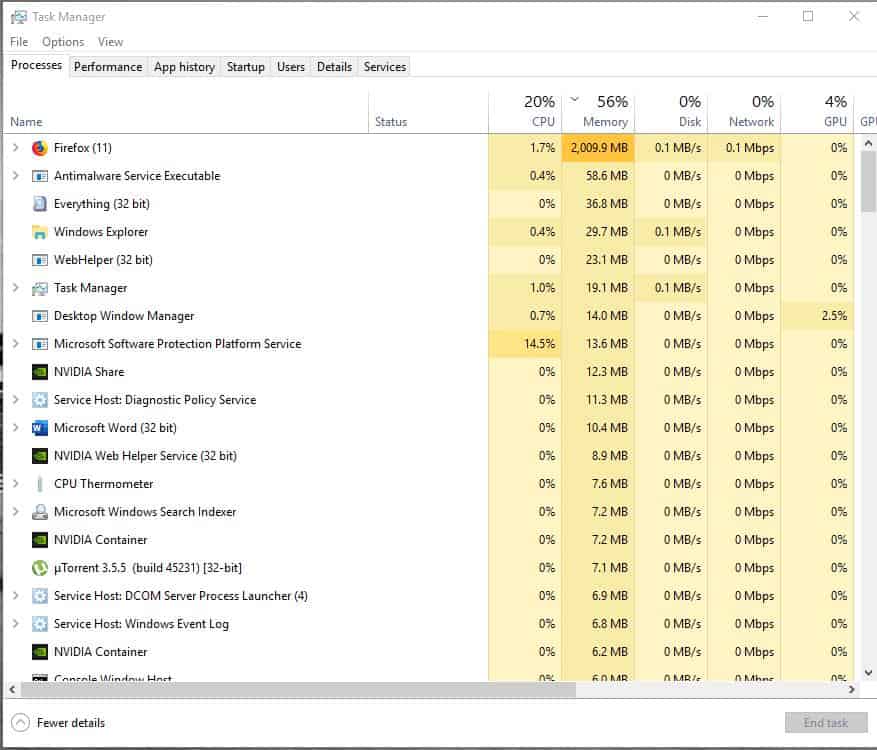
Step 2: Task Manager will open, over here we can see Firefox is the application consuming the most memory at nearly 2GB.

Step 3: If you find a process consuming an unnatural amount of memory, click on it
Step 4: Press the End Task button located near the bottom right corner of Task Manager
Kill App on Activity Monitor (MacOS)
Step 1: Click Command + Space to open Search
Step 2: Type in Activity Monitor
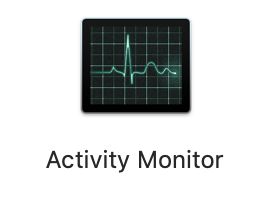
Step 3: A new window with your MacBooks resource utilization information will pop up
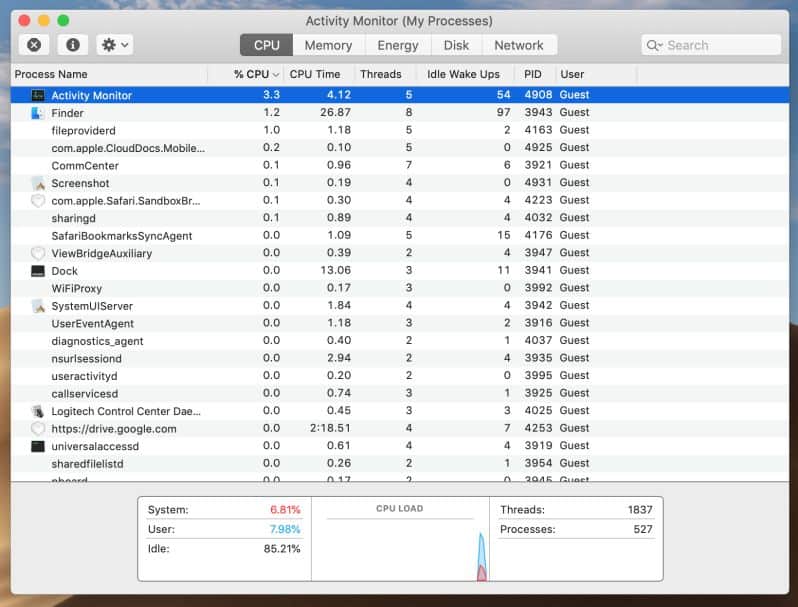
Step 4: Click on Memory in top menu

Step 5: Over here you can see the list of applications consuming memory in descending order
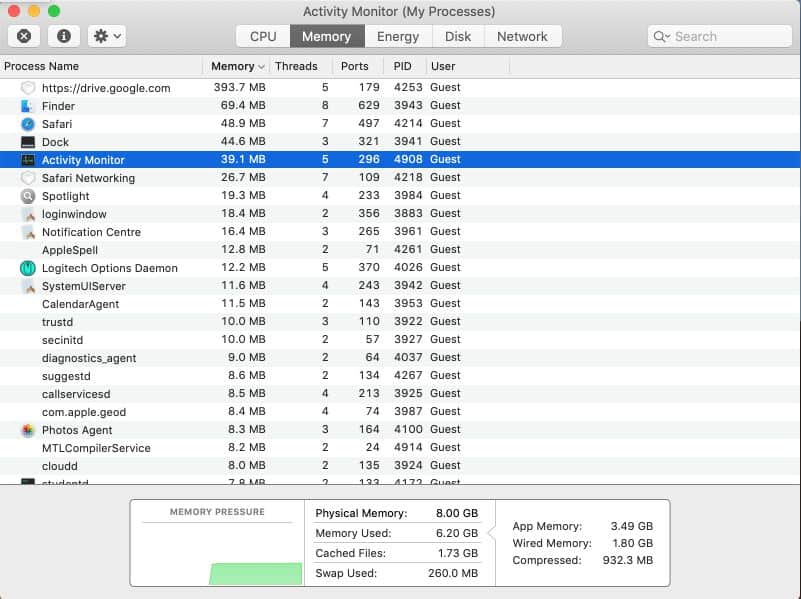
Step 6: If you find a process consuming an unnatural amount of memory, click on it and press the button with a cross symbol within it located near the top left side edge to quit the process

Step 7: Click Ok or Force Quit when prompted.

If you have no use for some applications that you find here, it would be better if you uninstall them altogether.
Run Virus/Malware scans
It is very important that you run Virus and Malware scans on your laptop on a regular basis. Viruses and malware can eat up your system resources without you even realizing it. Some even restart the moment you might try and close them with task manager or something.
In addition to this, make sure you keep all your software updated as well. Usually, patches within updates can make these applications less resource-intensive than before, especially on your RAM.
Disable Startup Programs (Windows)
Step 1: Press Ctrl + Shift + Esc keys together to launch Task manager
Step 2: Click on startup located in the upper tabs

Step 3: You will be presented with a list of apps that can run on startup
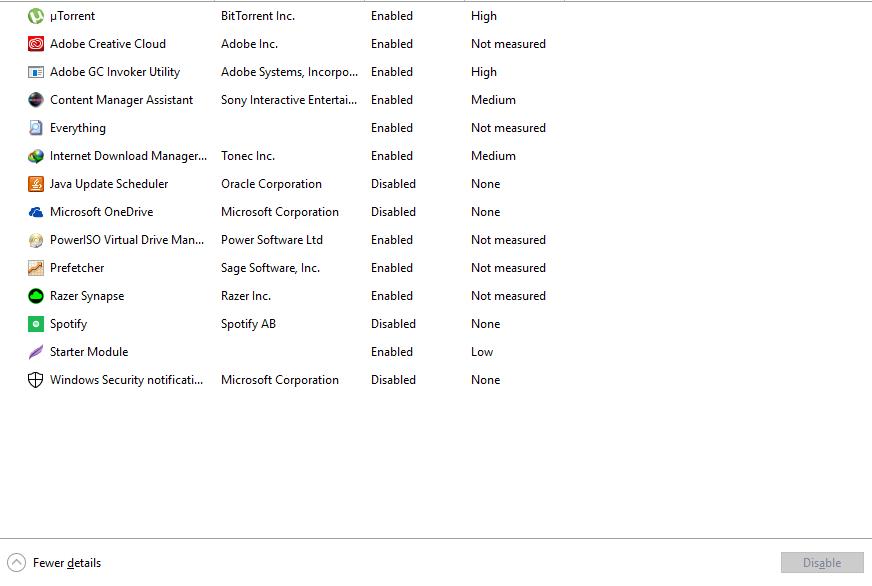
Step 4: Click on a specific application to view if it is enabled or disabled to launch at startup and whether it has a low / medium / high impact on how fast Windows boots.

Step 5: To choose to Enable to Disable an application on startup click on it, and click the button marked Enable/Disable near the bottom of the Window.
Remove Login Items (MacOS)
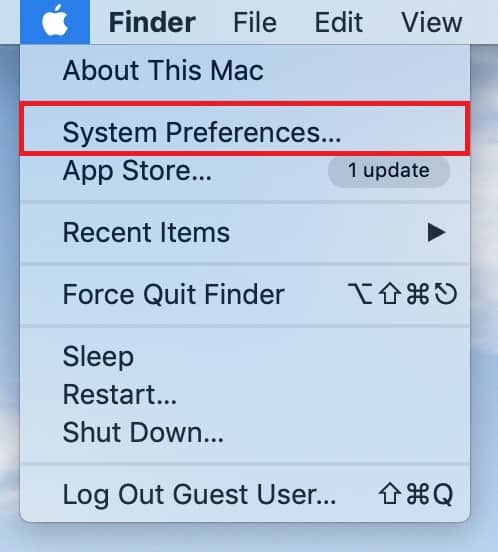
Step 1: Click on the Apple logo

Step 2: Click on System Preferences
Step 3: A new window will pop up
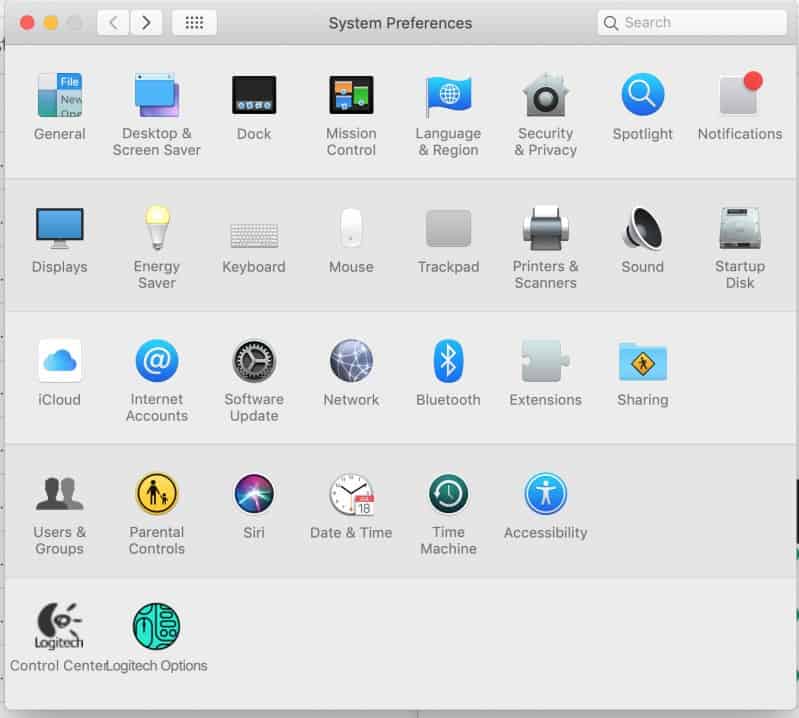
Step 4: Click on Users & Groups

Step 5: You will be presented with a layout like this
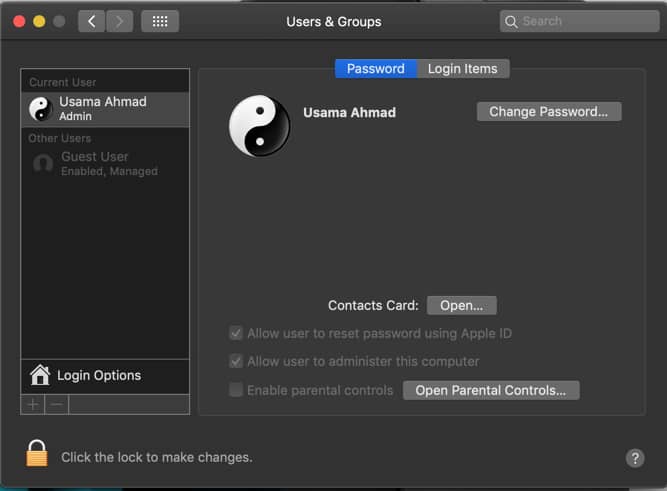
Step 6: Click on Login Items

Step 7: Select an application that you want to remove from launching on startup
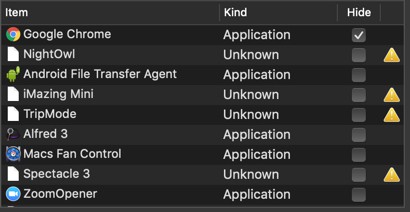
Step 8: Click on the “-” to remove it

Using a USB Flash Drive/SD Card as Ram (ReadyBoost)
If your laptop still has a mechanical hard drive, then ReadyBoost is a feature that might speed up your laptop for a little to no investment.
What ReadyBoost does is that it allows you to plug in a USB flash drive or even an SD card and use it as extra RAM. Yes, it won’t ever be as fast as an actual RAM stick, but it couldn’t hurt to try.
This method is only applicable for computers that are running only mechanical hard drives and not SSD’s or both. The effect of ReadyBoost wouldn’t even be noticeable if you already have an SSD in your system.
Step 1: Plug in your USB flash drive into your laptop
Step 2: Click on the folder icon in the taskbar

Step 3: Click on This PC
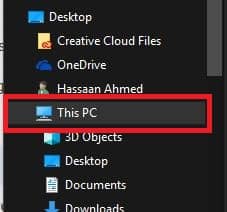
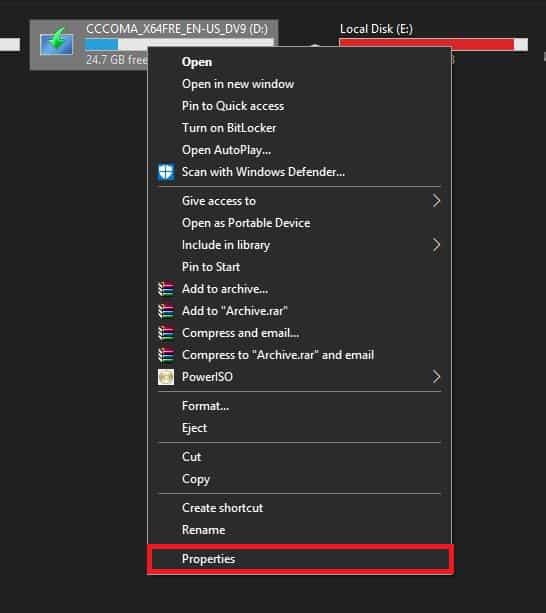
Step 4: on your external storage and click properties
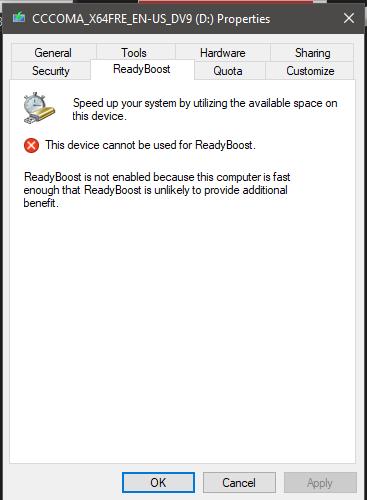
Step 5: Click on ReadyBoost in the top hand menu section
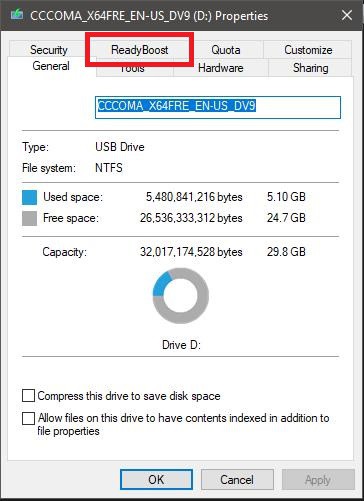
Step 6: From over here you would be able to set up your external storage as extra RAM. However as the PC this was tested on had an SSD. It gave an error saying the computer is already fast enough.
Conclusion
So after going through our short but detailed guide, you should have all the information you need to know how to increase your usable RAM without having to purchase more. As well as how to avoid the scam articles and applications out there that claim free RAM.
If you feel we missed out on anything, leave a comment down below telling us!

Kenny Trinh is a seasoned expert in the field of laptops and technology, boasting an extensive background enriched by years of hands-on experience and in-depth research. With a keen eye for innovation and a passion for staying ahead of the technological curve, Kenny has established himself as a trusted voice in the tech community. Holding a prestigious degree in Computer Science, he combines his academic insights with practical expertise to deliver valuable insights and recommendations to his readers and followers. Through his work, Kenny aims to demystify complex tech concepts, empowering individuals to make informed decisions and optimize their digital experiences.
