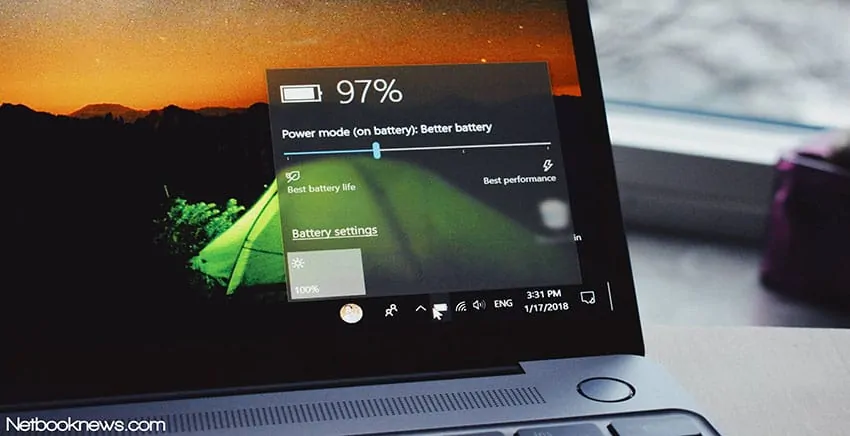
“What Should I Do With A New Laptop Battery?” is one of the most common questions people ask when purchasing a new laptop or a new battery for their current one. That’s why we’ve put together a short but detailed guide on some tips and precautions to follow with a new battery.
No one likes having their laptops battery life deteriorate to around half its capacity within less than a year. So that’s why when you get a new battery/laptop your going to want to do everything possible to ensure you’re maximizing its lifespan.
Sadly battery technology hasn’t progressed as much as we would have hoped for. So it’s crucial that you follow a number of tips and precautions that will keep your battery healthy and for longer. These will mainly revolve around.
- Your charging habits
- The environment you use your laptop within
- Monitoring your battery health periodically
7 tips For Healthy & Long-Lasting (New) Laptop Battery
A Lot of people would have you believe that it’s okay to keep your laptop plugged in charging all the time, or that you don’t need to break in the battery when it’s new. We wish that were the case, but it simply isn’t.
This is the reason people need to often replace their laptop batteries when they aren’t even a year old yet. Then they wonder the same thing again when they purchase a new one, and that one follows the same premature patterns.
Breaking In a New Battery
Whenever you purchase a brand new laptop or a new battery it is often only charged to around 50% of its capacity. Rarely will you ever find one that comes fully charged out of the box?
Leave your laptop plugged in charging until the battery reaches a 100% charge. We recommend leaving it charging even after it reaches full capacity for a few hours. Try to avoid using your laptop during this period as well, if at all possible.
Once a few hours have passed you can remove the laptop from charging, and use it normally until the battery fully discharges and the laptop shuts off by itself due to a low battery warning.
Then you’re going to want to let it charge to 100% again. What this does is that it calibrates the battery. You can repeat this process 2-3 times if you want a perfect calibration, but once should also be enough.
Avoid high temperatures
Research conducted by Battery University has shown that high temperatures can have a pretty profound effect on your laptop, and not in a good way.

Their research showed that when your laptop battery is exposed to temperatures above 32C/89F for prolonged periods of time. It can actually damage your battery.
They stored a numerous number of ordinary lithium-ion batteries, the most common type of batteries for laptops in a range of temperatures for 3 months.
Results showed if you store your battery charged at 100% at a temperature of over 40C for 3 months. The maximum battery capacity will drop to just 65%.
So if you plan to be your using your new battery in high temperatures you should avoid it altogether if you want to escape from premature battery degradation.
To learn more about these tests and any information pertaining to batteries, just head on over to Battery University’s website.
Avoid Full Discharge
Whenever possible avoid letting your battery drain all the way to 0% whenever you can, it’s okay when you want to calibrate your battery. Though you should not try to not make it a regular thing.
If you let your laptop fully discharge for an extended period of time then it can cause permanent damage to the battery, and it might never be able to hold a charge again.
To put the definition of full discharge in more technical terms. It is when the battery runs out of power to the point where the chemical process in the battery cannot be fully reversed by charging, effectively rendering your laptop battery useless.
Avoid Charging Your Laptop Battery To 100%
A laptop battery is only rated for a certain number of charge cycles. It is a term used to describe the estimated lifespan of a battery. To define it in technical terms, it is “the process of charging a rechargeable battery and discharging it as required into a load”.

Most ordinary lithium-ion laptop batteries when charged to 100% regularly have an estimated 300-500 charge cycles lifespan. However if you don’t let your laptop charge above 80% of its maximum battery capacity, you can more than double the lifespan of your battery.
Tests conducted by battery university showcased that if you charged your battery to 80% the charge cycles rose to around 600-1000. If you go even lower to say 60% its around 2400-4000 charge cycles.
Though 80% is pretty much considered the sweet spot, as it can still give you a decent amount of battery life, and prolong its lifespan by over double.
Remove Your Battery When Storing It for a Prolonged Period.
If you happen to be storing your laptop for a prolonged period of time, let’s say longer than a week or two. Then we would recommend removing the battery from your laptop if at all possible.
Store the battery in a place where the temperatures do not exceed 30C either, and by that we don’t mean you go pop it in the freezer for 3 months. Just someplace where moisture and heat won’t be able to get to it.
Once you take it out of storage, charge the battery to 100% again before letting the laptop run solely on battery power.
Keep Your Software Updated
Try and keep Windows/Mac OS or whichever distribution of Linux you use, and your software updated. These updates often contain patches that can reduce the load on your battery.
Keeping your Operating System updated is the most important of all. If you’re experiencing irregular drain even on a new battery. It could be your outdated OS that’s causing the issue.
Monitor Your Battery Health Periodically
If you want to get a full detailed report about the behavior, charge levels and estimated battery capacity levels from recent discharges. Then you can easily generate a full report right from Windows itself. You won’t even need to download any third-party software.
Through these reports, you can get an idea of how your charging habits are affecting the performance and lifespan of your battery.
Step 1: Click on the Search Bar near the Windows Start Menu button

Step 2: Type in “CMD”
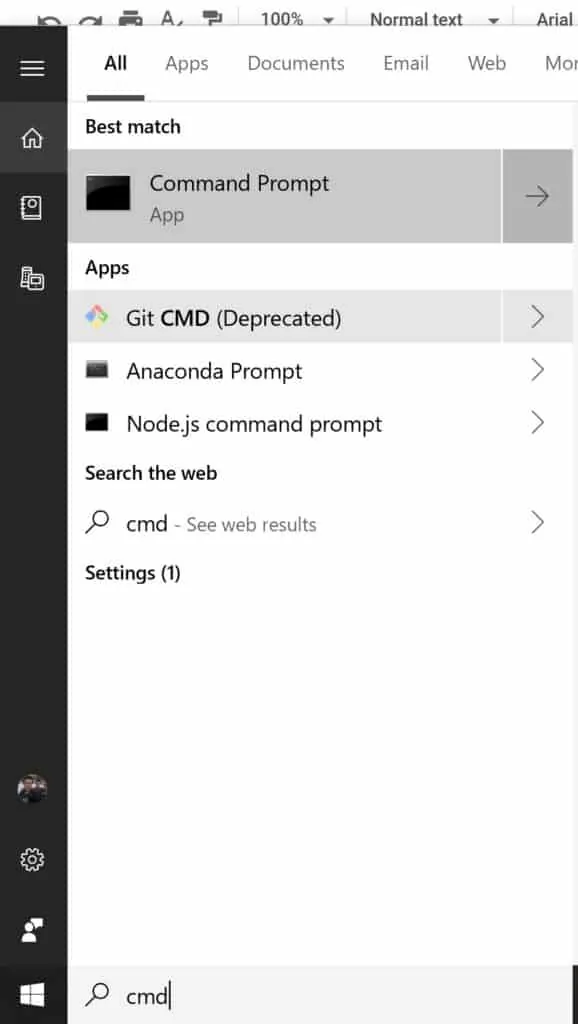
Step 3: Right Click on Command Prompt.
Step 4: Click on “Run as Administrator”
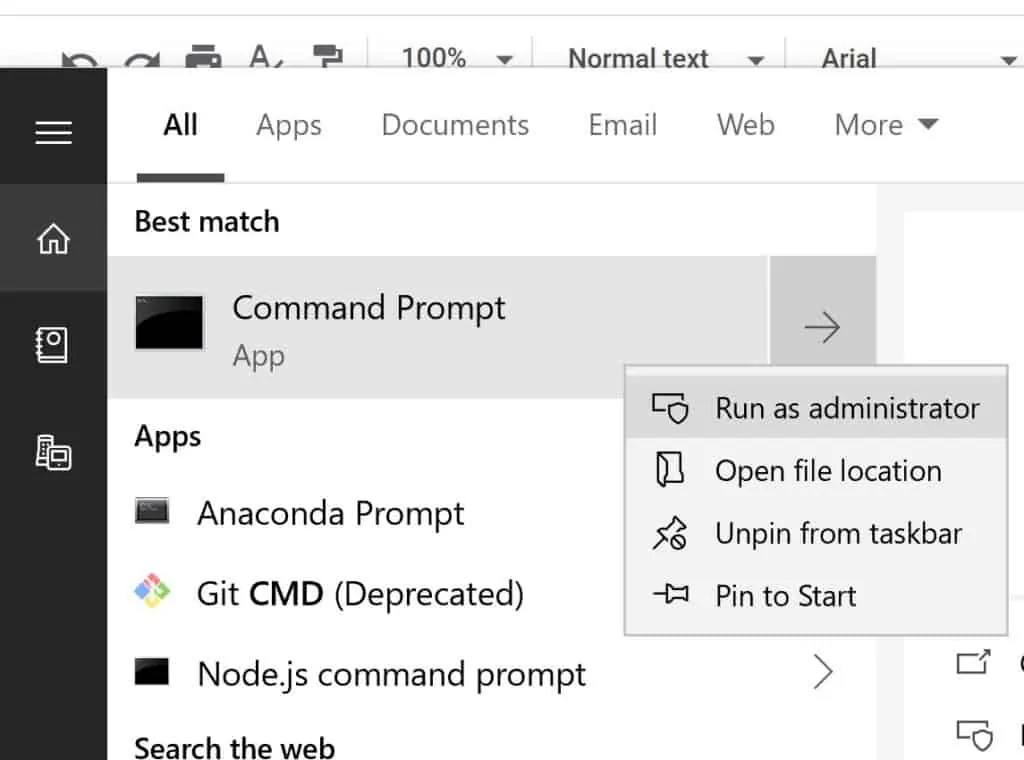
Step 5: You will be presented with a layout like this.

Step 6: Type in the command “powercfg /batteryreport”

Step 7: Once finished it should give you the URL of where the battery report is saved. Copy it from CMD.

Step 8: Open File Explorer and paste it in the file path section

Step 9: A new tab will open in your browser with the battery report.
Step 10: The section Installed Batteries will give you info on your original and current battery capacity.

Step 11: The section Recent Usage gives you power stats over the last 3 days.
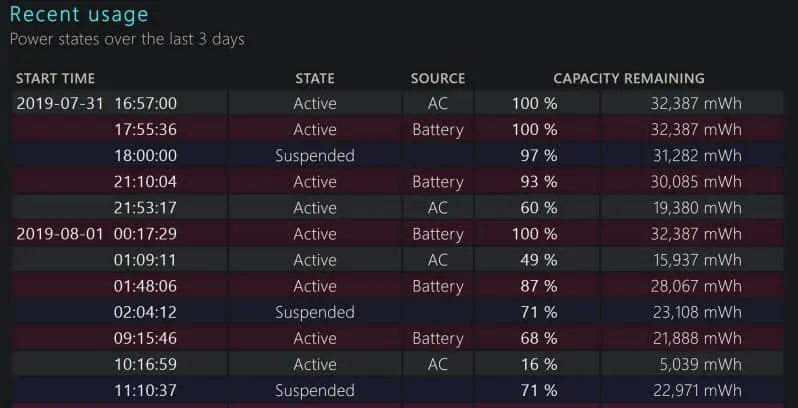
Step 12: The section Battery Capacity history gives you information on how the capacity has decreased over time.

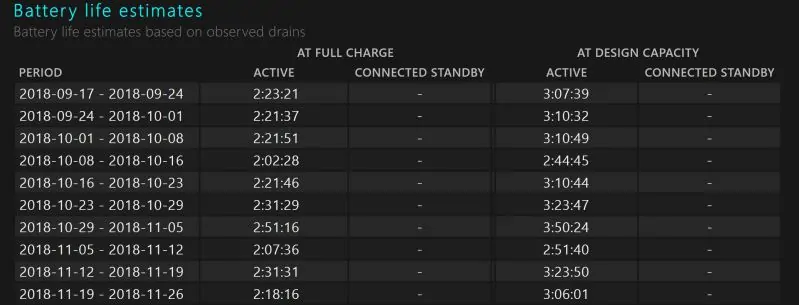
Step 13: The section Battery Life Estimates gives you an estimated battery life based on previous battery life drain recordings.
Conclusion
So after reading our short but detailed guide, you should be familiar with all the tips you need to follow, and all the habits you need to avoid to ensure your brand new laptop/battery remains healthy for a long time.
If you feel we left something out, be sure to leave that in a comment down below!.
Hassaan has been passionate about technology for as long as he remembers, and aims to provide you with all the information you need to find the right laptop for you.
