If your looking to rotate your laptop screen, or its just stuck sideways. Then here’s a quick and detailed guide about everything that you need to know on rotating your laptop screen.
There’s many reasons why you would want to rotate your screen in the first place. Let’s say you have an external monitor connected to your laptop, and you want to use it in portrait orientation.
You’d be surprised how many people use their screens in portrait orientation, it can be great for editing pictures, or going through a large amount of code. Try it if you feel your workflow might suit it, it can drastically increase your productivity.
We’re going to be looking at how to rotate your screen on both Windows and MacOS, as well as how to fix a stuck sideways screen, and setting up shortcuts for rotating your screen.
How To Rotate Screen On Windows 10
To rotate your screen in Windows is actually pretty easy, and can be done in just a few steps right from your Desktop.
Using Settings
1.Right click on your Desktop
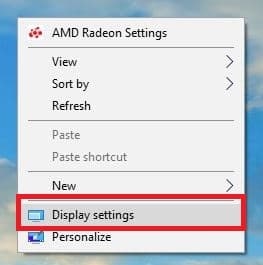
2. Click on Display Settings
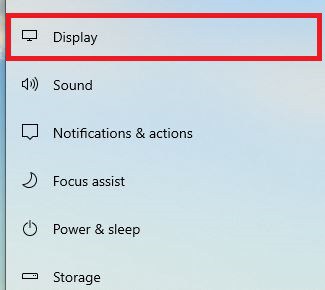
3. Find the “Display” tab on the left hand side of the window, and click it
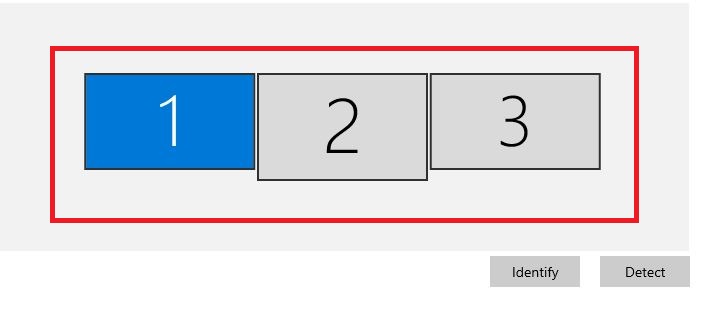
4. If you have a multi monitor setup choose, which of your screens you would like to rotate.
5. Scroll down until you find “Screen Orientation”
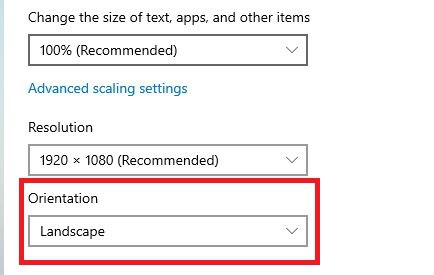
6. Click it to reveal a dropdown menu.
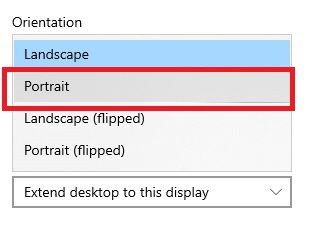
7. Choose Landscape
Using HotKeys
Some laptops, and PC’s come equipped with shortcuts that you can press to rotate your screen. Not every laptop or PC has this mind you so don’t worry if your screen doesn’t rotate when you try to press these buttons.
Also when your typing and your laptops screen suddenly rotated. This is most definitely the cause of this. To rotate your screen press the Ctrl + Alt + Arrow Key.
Up Arrow Key: Returns your screen to the normal landscape orientation
Right Arrow Key: Rotates your screen 90 degrees.
Down Arrow Key: Rotates your screen 180 degrees.
Left Arrow Key: Rotates your screen 270 degrees.
shortcut to rotate screen
If you’re the sort of person that wants to constantly switch back and forth between a landscape, and a portrait orientation, and don’t want to have to go through the hassle of changing the settings every time.
Then you can pretty easily set up some shortcuts that can easily allow you rotate your screen with just a few clicks.
iRotate
iRotate which unlike its name suggests is a Windows only tool that allows you to quickly rotate your screen. To download iRotate click on the link here to download it.
It’s a fairly simple, and light application. So it won’t take up almost any space or resources on your laptop.
Once you download iRotate on Windows 10, it will appear in your system tray. If you have multiple monitors. Multiple labelled instance of each monitor will be shown in the tray.
To rotate a particular monitor, just click on it, and choose your rotation angle.
Display Utility
If for whatever reason iRotate or any other application isn’t working on your laptop. Then there’s another way. However this method is a little more tedious than the rest.
Head to this link here and navigation to the Display section, and click download.
1.Download and extract the zip file, its internals should look a little like this.

2. Select either display32 if you have 32 bit windows, or display64 if you have 64bit windows.
3. Copy the directory

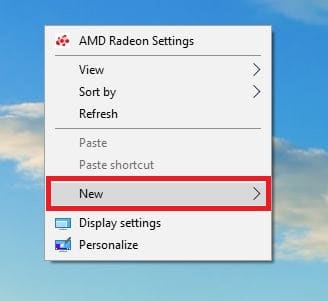
4. Go to our desktop, and right click
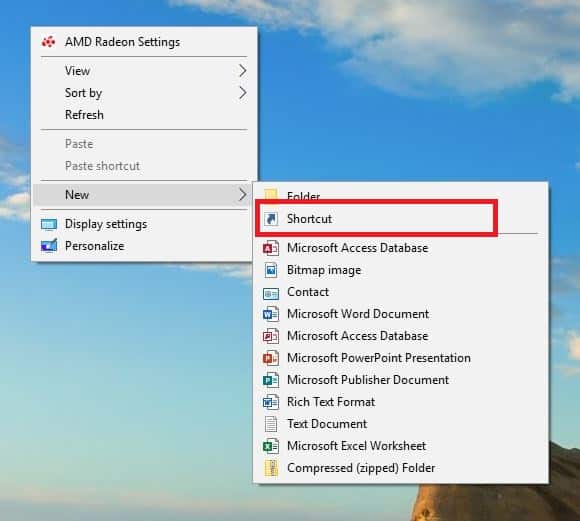
5. Go to New
6. Click on Shortcut
7. Once you do a new window will popup paste the directory located you copied followed by “\display64” or “\display32” and “\rotate: 90”
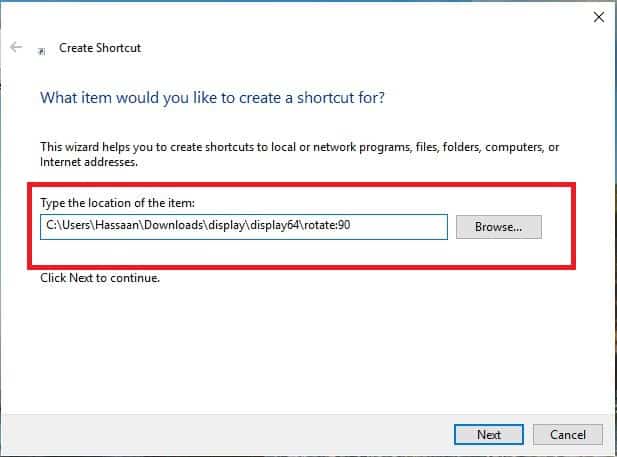
8. Type out a name for your shortcut
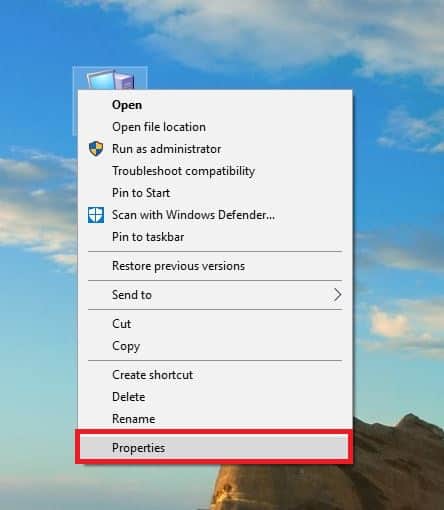
9. Right click on your new shortcut, and click properties
10. Over here in the shortcut section you assign you own unique key combo to trigger rotating your screen.
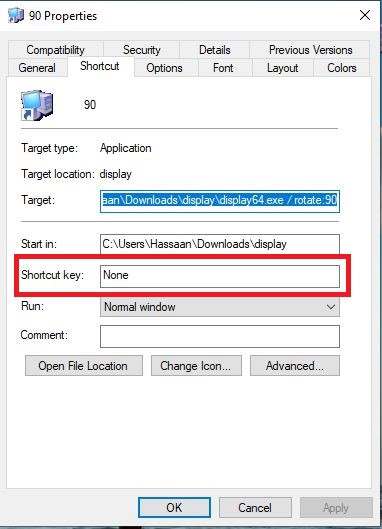
11. If you want to create separate shortcuts to rotate either 180 or 270 repeat the process above and replace rotate:90 with rotate:180 or rotate:270.
How To Rotate Screen On Mac
You can just as easily rotate your screen on MacOS, as you can on Windows. You don’t need any third party application as it can all be done through the operating system settings.
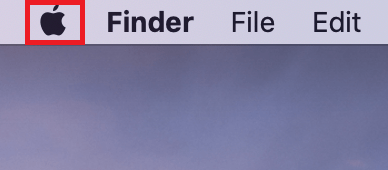
1. Click on the Apple Logo
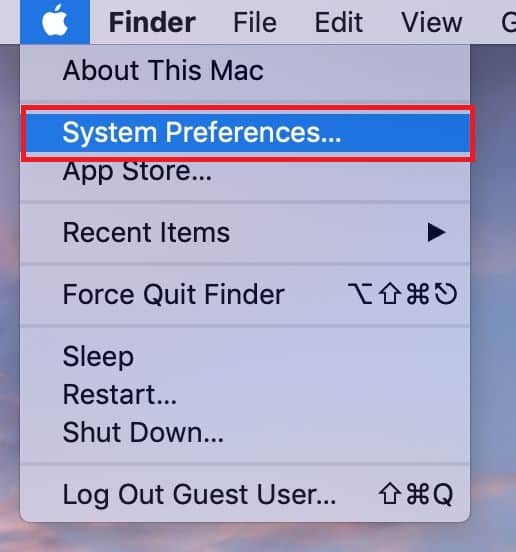
2. Click on System Preferences
3. Hold down Cmd + Option key and click on display
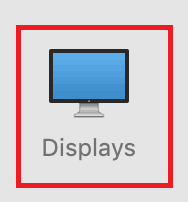
4. Choose the orientation for your display.
Though some people have reported that they needed to hold down cmd + option when clicking on system preferences too to showcase the rotation setting. Be sure to try both ways if one doesn’t work for you.
Also remember to keep holding both keys throughout your navigation until you get to the rotation screen. Many people only press them once and wonder why that option doesn’t show up.
Laptop Screen Stuck Sideways?
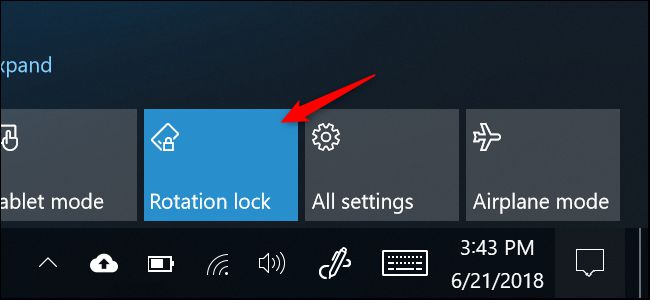
If your screen is stuck rotated and won’t go back, then it’s probably because you enabled rotation lock on your PC. This rotation lock works just like the one you have on your smartphone, and can be easily disabled.
So if you have a convertible or tablet style laptop then probably the orientation lock is on, and thats why your screen won’t go back to normal.
You can disable it by:
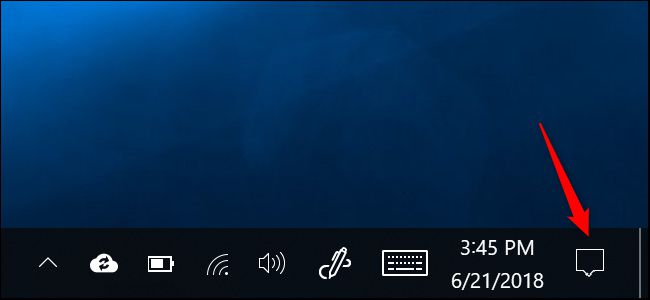
1.Clicking on Action Center located at the lower bottom right corner of your display.
2. Clicking on Rotation Lock.
If your rotation lock isn’t being displayed within the action center then you can turn it off from settings as well.
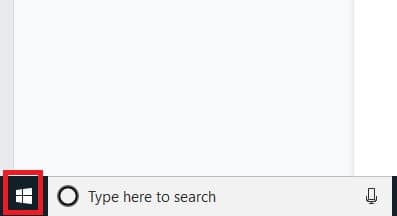
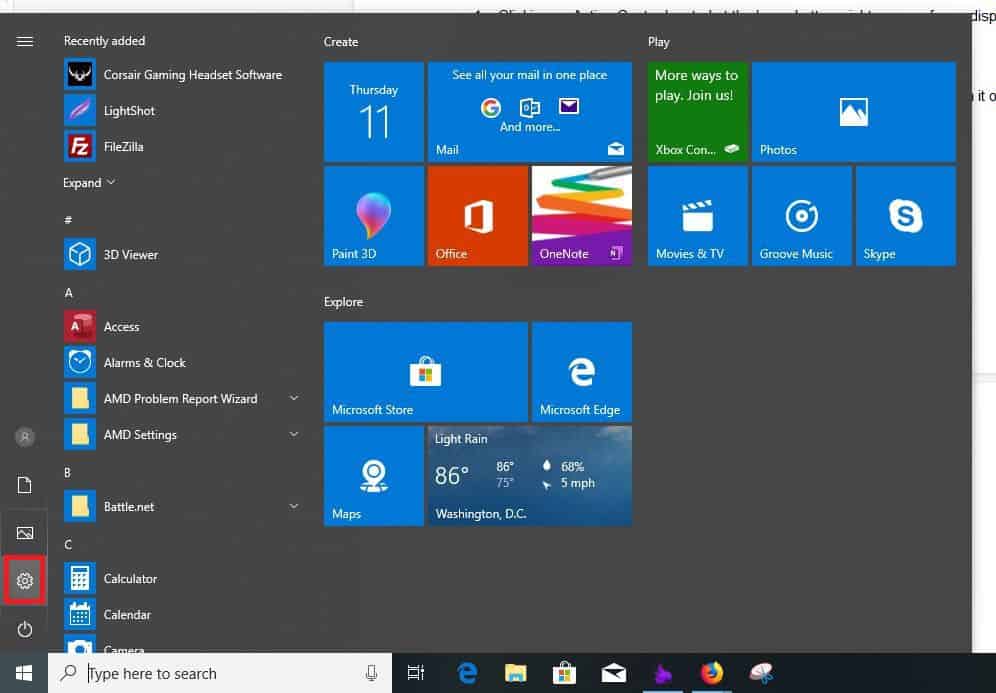
1.Click on the Windows Start Menu
2. Click on the Settings gear icon
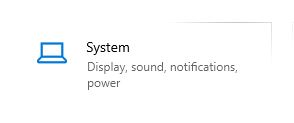
3. Click on System
4. Click on Display

5. Disable Rotation Lock
Conclusion
So after reading through our extensive guide you should be easily able to rotate your screen, or fixed a stuck sideways screen on your laptop!
Be sure to leave a comment down below on which method you choose for rotating your screen, or fixing it from being stuck.
Also if you feel we missed anything important be sure to leave that down below as well.
Hassaan has been passionate about technology for as long as he remembers, and aims to provide you with all the information you need to find the right laptop for you.
