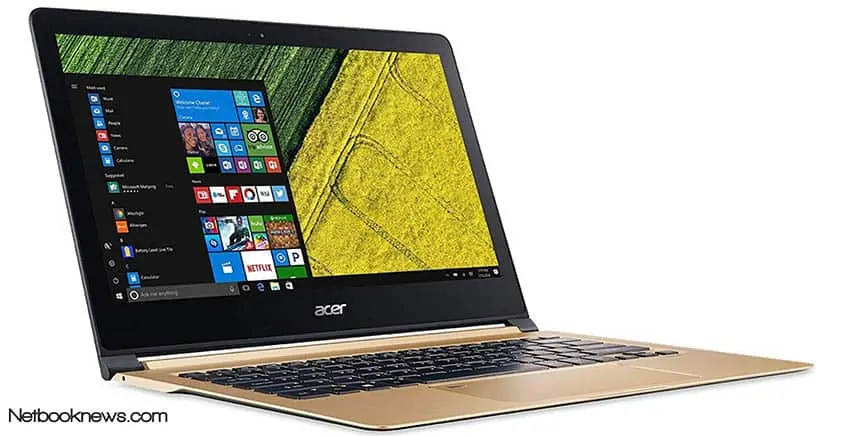
With the advent of ultra slim laptops and mini notebooks, possession of a CD/DVD isn’t a must any more; yet traditionally, the operating system has always been installed from a CD/DVD drive.
In another not so cool instance, your laptop may have one; but damaged by the time you will need to install windows. So in any case you need new windows OS, you will have to install it without a CD/DVD drive.
How To Install Windows without a CD Drive
Step 1: Install Windows from ISO file on a Bootable USB Storage Device
For starters, to install windows from any USB storage device, you need to create a bootable ISO file of the windows operating system on that device.
Here are the two ways you can create a bootable ISO file:
Method 1: Download an ISO file direct from Microsoft
Step 1: To begin, you will need to get a USB flash disk or memory card of at least 4GB for windows 7; and more than 8GB for windows 8 and later. For a clean OS installation, it’s recommendable the flash disk is formatted.
Step 2: You will be required to provide your window’s product key (xxxxx-xxxxx-xxxxx-xxxxx-xxxxx). This number can be found in the confirmation email that you used to purchase the operating system or your laptop label.
Step 3: Click on 32-bit or 64-bit depending on the architecture of your computer. Wait until your download is 100% complete.
Step 4: Extract the ISO files and copy them to your USB device; it should be bootable by now. For windows
Note: The above method works best for windows 7 installation files.
Method 2: Use Media Creation Tool
This is a free tool from Microsoft used for downloading ISO files for Windows Os starting from windows 8 to date.
Step 1: To begin, you will need to download the Microsoft media creation tool.
Step 2: When ready, you will need to run the tool as an administrator.
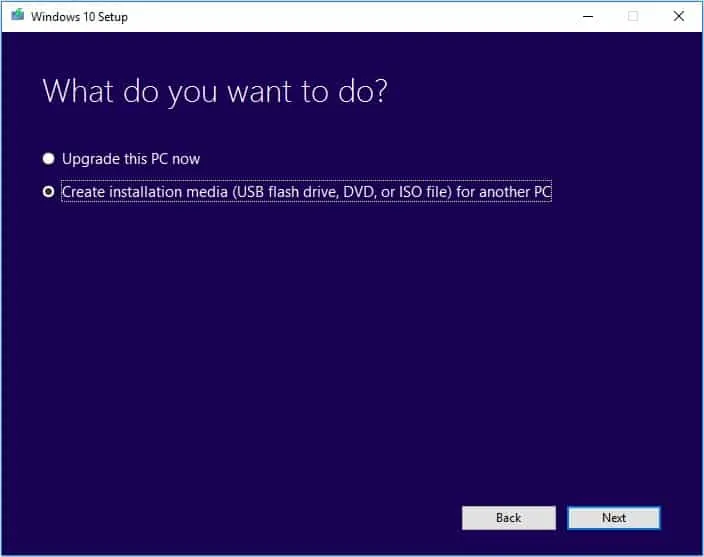
Step 3: You will be prompted for what you want to do, select ‘Create media for another PC’, then next.
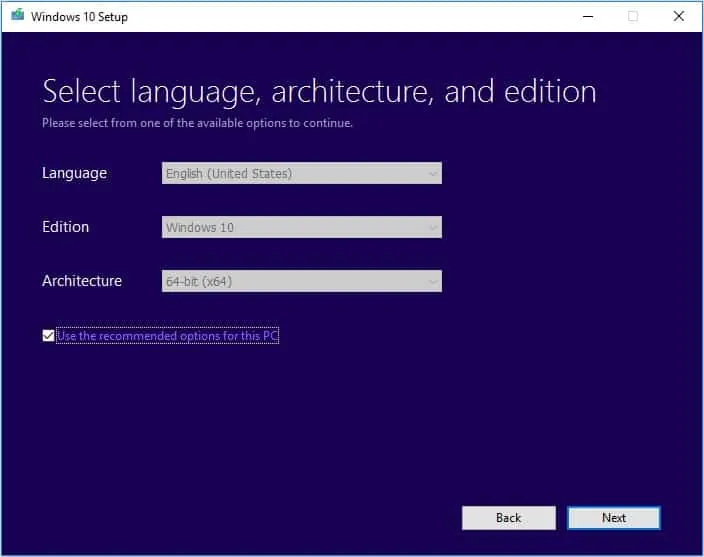
Step 4: Next you will select language and Architecture you want to use. Select 32 bit/64 bit depending on your laptop.
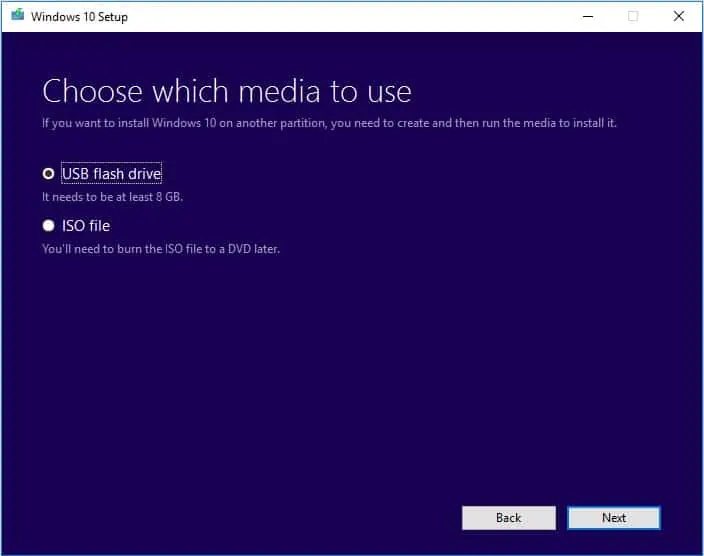
Step 5: Follow the prompts; you will be required to select the media to use.
- Select USB flash
You will need to provide an empty flash drive of more than 8GB of storage space.
- ISO file
You can save this on your PC to use later on other media.
Step 6: Next, click ‘removable drive’ when prompted.
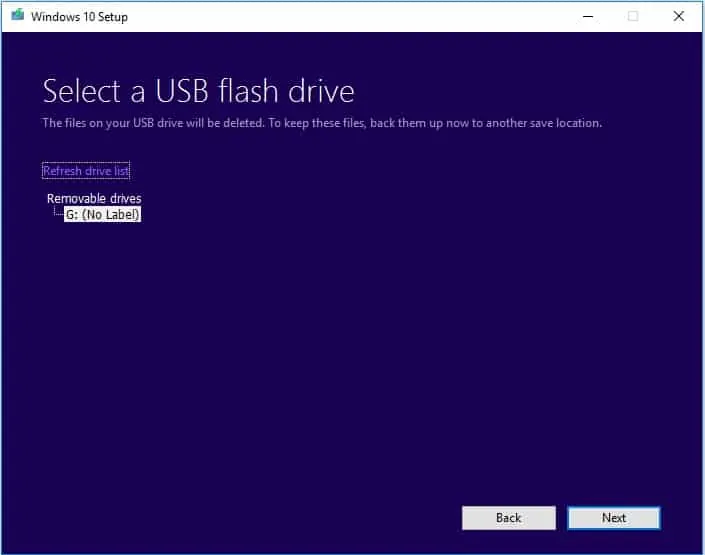
Step 7: Your download will start. Wait until it notifies you that ‘USB flash drive is ready’ , click finish. You may now unplug your flash drive.
NOTE: Though the media creation tool runs on Windows 7, it cannot download windows 7 ISO files.
Step 2: Install Windows Using Your Bootable Device
Step 1: Switch off your laptop.
Step 2: Insert your bootable USB flash drive, memory card or external portable drive into your USB drive and then switch on laptop
Step 3: Press Esc/F2/F8/F10/Del depending on your manufacturer to get into BIOS ‘setup’. Use the up/down arrow on your keyboard to set the boot sequence in the advanced boot settings as below..
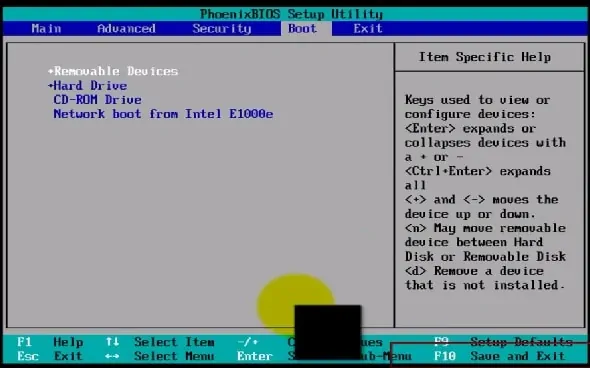
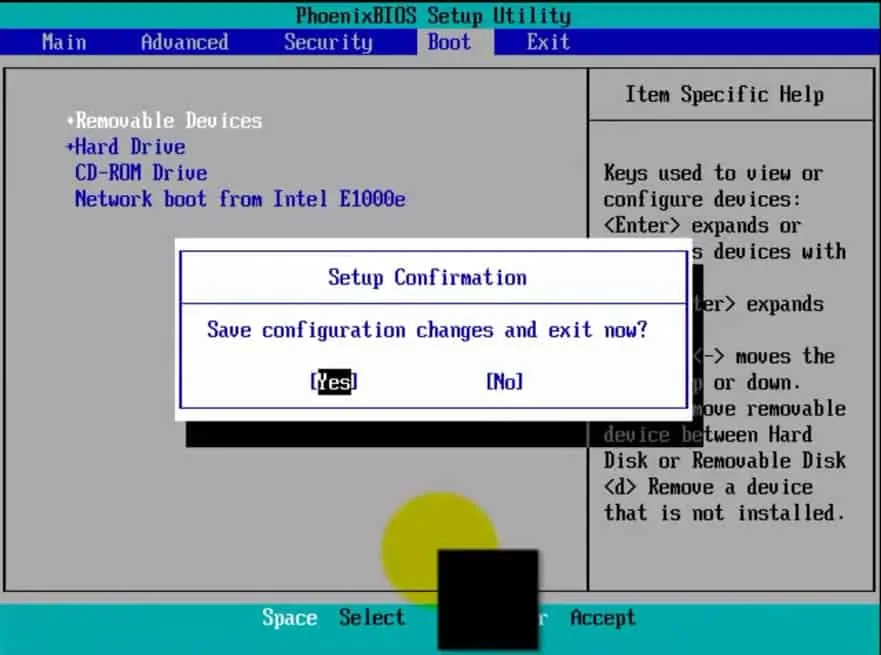
Step 4: Save the settings and exit. When your laptop reboots, you will see the following screen;
Step 5: Set the language, time plus keyboard format.
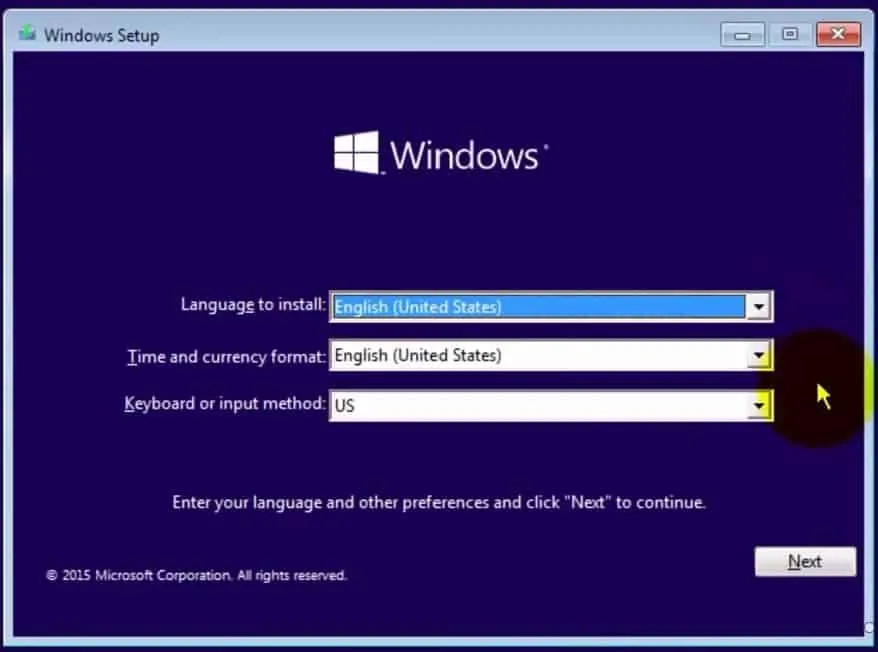
Step 6: When you click continue, you will be prompted to click on ‘install Now’ button which will lead to where you fill in your product key which you can skip in case you don’t have.
Step 7: Accept the Microsoft software terms and conditions and click next;
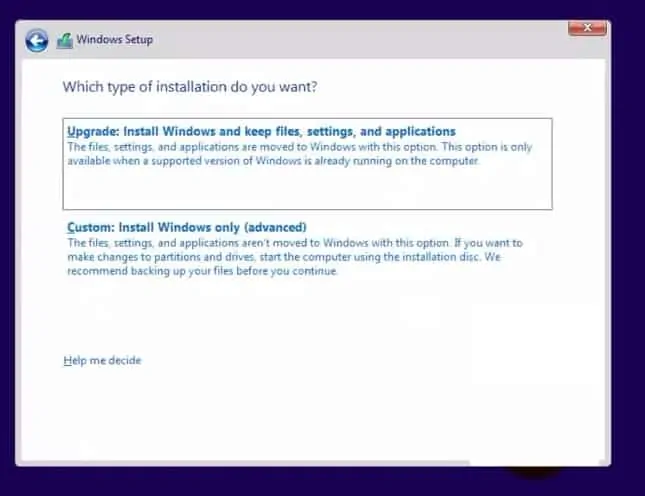
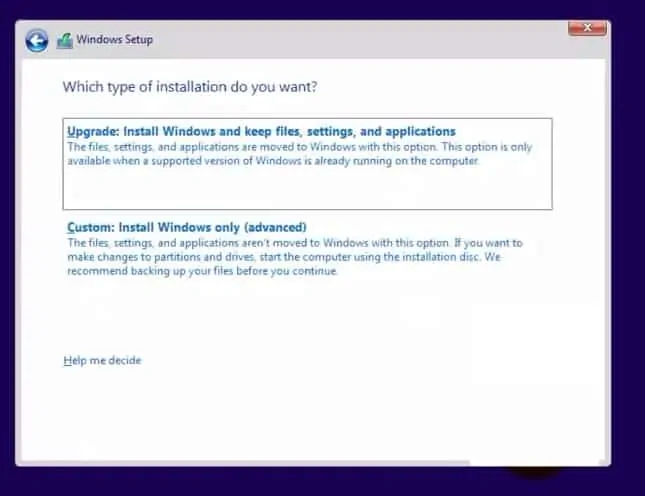
Step 8: Select between Upgrade and custom installation.
- Upgrade: In case a supported version of windows is already installed, it will save all files and settings that are saved on the partition it will be installed.
- Custom: This gets rid of all files and settings on a hard drive then let’s you begin working with your laptop as though it were brand new.
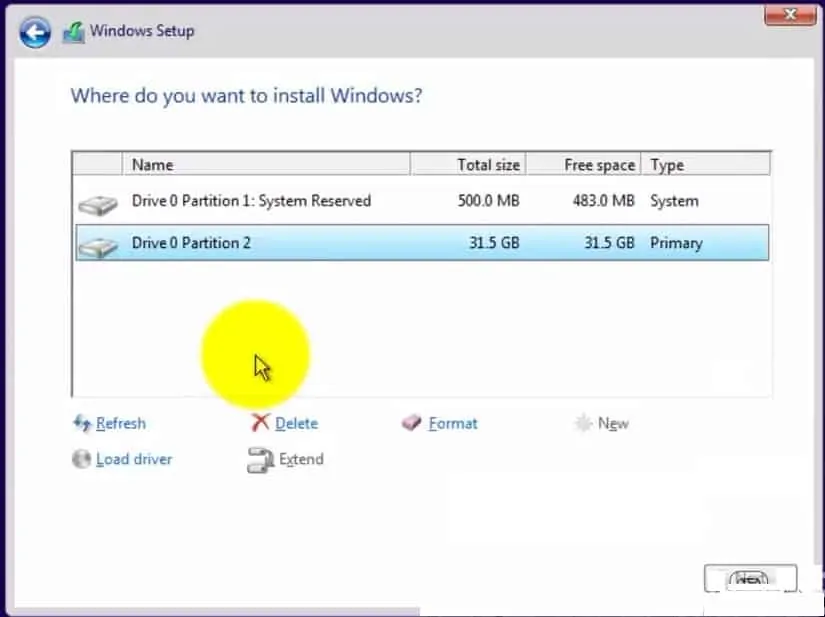
Step 9: The next step should be to choose the partition where you want your windows installed.In case your hard disk is not partitioned, here is how to do it.
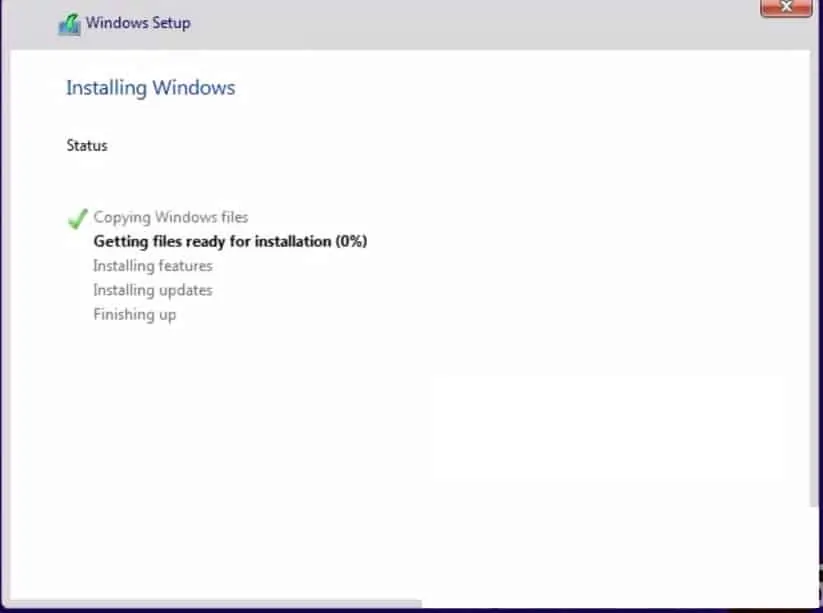
Step 10: The installation will automatically proceed. Remain alert just in case of any prompts. When complete, your laptop will restart and you will be required to input your preferred settings.
1. How to Install Windows from a Partition with ISO file
Sometimes you may need to reinstall windows on a PC that can boot but has minor errors. Here are the methods you will use to succeed:
Method 1: Mount an already existing ISO file.
Once you are in possession of an ISO file, proceed with the steps below to simply install windows:
For Windows 8 and later, mount the ISO file by:
Step 1: Go to your ISO file, right click it; select ‘Mount’
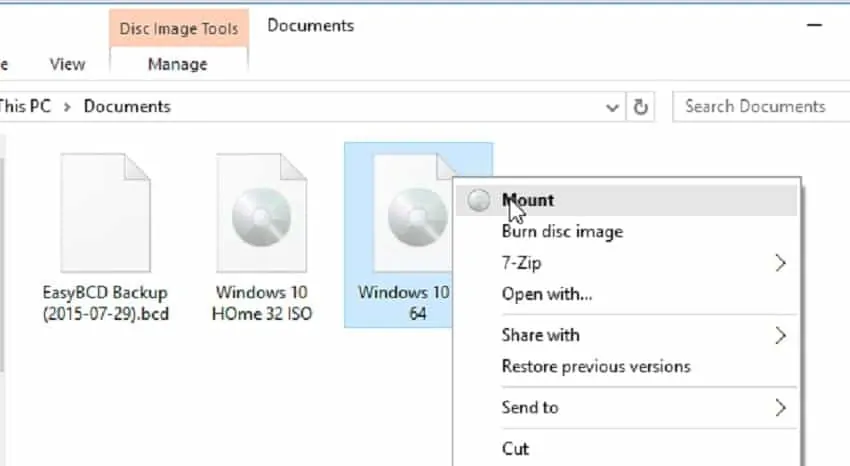
Step 2: When you double click the ISO file now, you should view the executable file ‘Setup.exe’.
Step 3: Click to begin the windows installation. Follow the steps for installation as already discussed above.
Note: For windows 7 and below, you will need to download a tool like Power ISO that can help you mount a file.
Method 2: Use Command Prompt
Another way how to install windows from an already existing ISO file on a hard disk partition is to use command prompt. This method requires that you backup your data before proceeding because it deletes all data.
Here is how you will do this:
2. How to Install Windows from Local Area Network
If your laptop has no CD/DVD drive but you are able to set up a wireless network with other computer, worry not. The CD/DVD drive located on another computer can be used to install windows on your laptop over that network.
First, you need to know how to set up a wireless network. Here is an article to take you through that. Once you have set up a network, the steps below should take you through the installation.
Steps carried out on PC with CD/DVD drive:
Step 1: Go to My Computer and right click the CD/DVD drive, select properties.
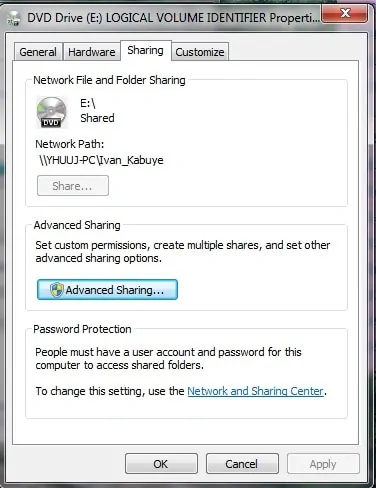
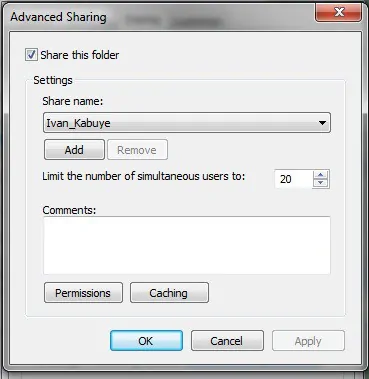
Step 2: In the sharing tab, go to advanced sharing. Click on ‘share this’ folder and give your CD/DVD a name.
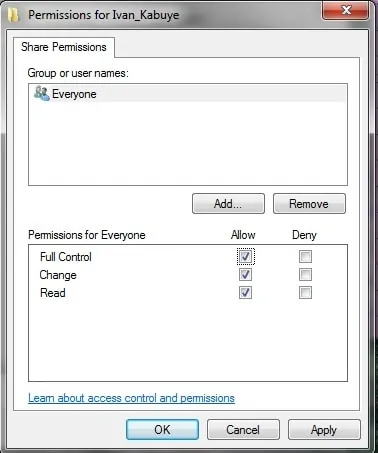
Step 3: Then click on permissions, add everyone into the object name field. Allow full control to all members on the network. Your laptop without CD/DVD drive should now be able to access it over the network.
Step 4: Insert the CD/DVD with the installation file of windows into the PC with CD/DVD drive.
Steps carried out on laptop without CD/DVD drive.
Step 1: Head straight to the start menu of your laptop, type in network and select computer with the CD/DVD drive.
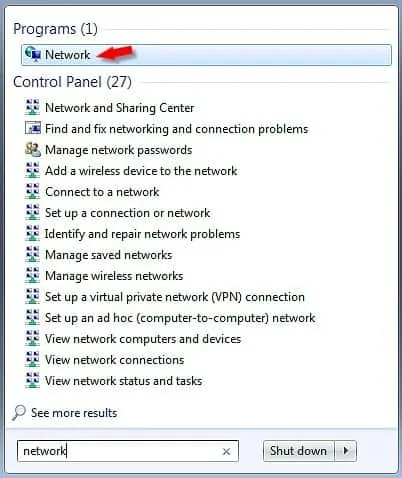
Step 2: Click on the name of the shared drive
Step 3: Look for the executable (setup.exe) on the drive and click it. It will launch the installation of windows on your laptop.
3. How to Install Windows using your Smartphone
Sometimes you may need to install windows on laptop that failed to start but it has no cd/dvd drive and neither do you have a USB flash drive. Your last resort may be the Android smartphone.
Thanks to Drivedroid phone app, you are able to convert your smartphone into a bootable device that you can use to install windows on your laptop.
First, you will need to root your android phone.Here is how to.
Install the rufus tool on your working PC.
Follow these steps to turn your smartphone into a bootable device:
Step 1: Launch Google Playstore app on your android device, search and install Drivedroid app.
Step 2: Connect your Android phone to your PC using a working USB cable.
Step 3: Launch the DriveDroid app from your phone. Click ‘+’ button; it will display a drop down menu. Select ‘create blank image’.
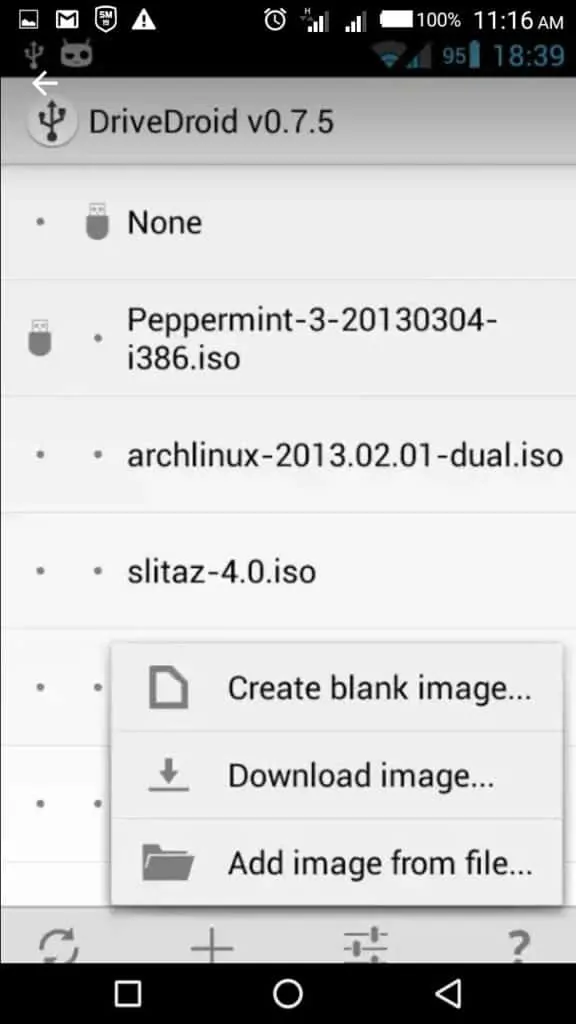
Step 4: A pop dialogue to name a file and give the size of the image will appear. For our case, it’s your windows OS ISO file from Microsoft. Set the maximum size at 3999MB, and then click ‘create’
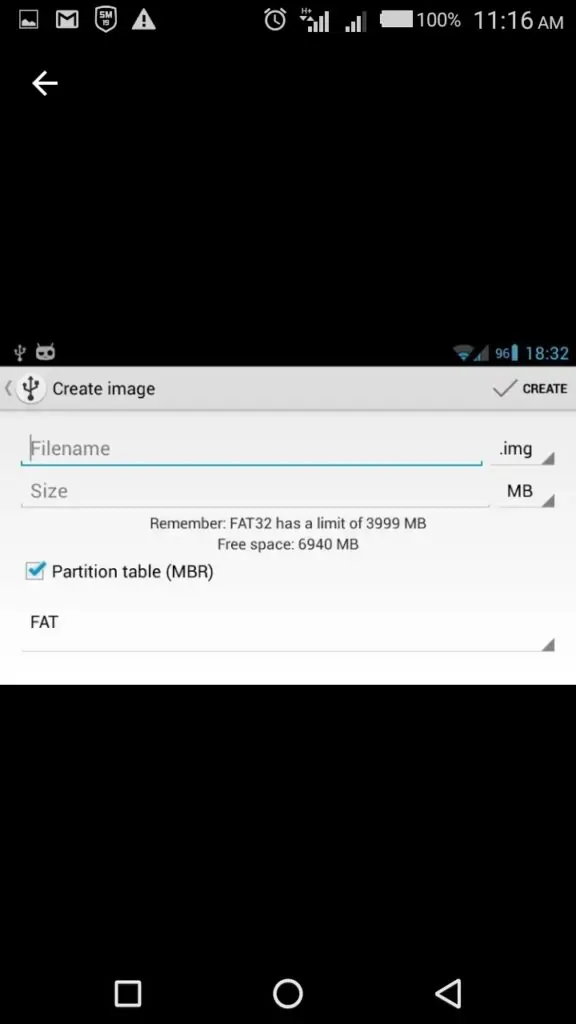
Step 5: Uncheck the partition table. For the file system, choose ‘None’. The rufus tool installed on your windows computer will do them.
Step 6: Upon successful creation of image, select it in your DriveDroid app. The app will prompt you on how to host your new image; make sure you choose the first option which will host it as a writable USB drive.
Step 7: Ensuring that your phone is plugged in, launch the Rufus Tool. Unlike the windows built in ‘diskpart’, the rufus tool will make your phone bootable with minimum effort.
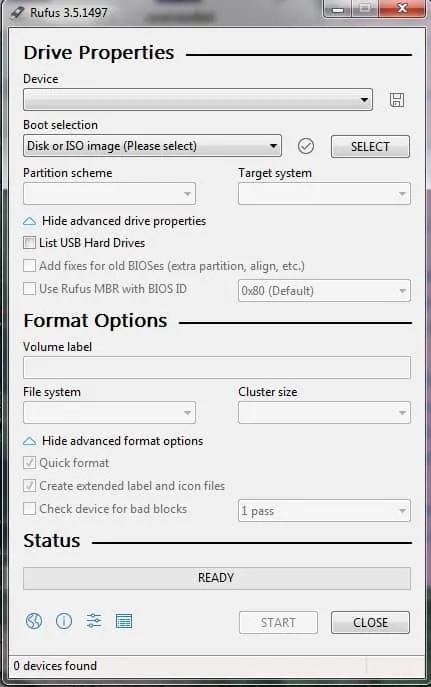
Step 8: Once launched, pick your phone as the USB device. On ‘Boot selection’, choose ‘ISO image’.
Step 9: By now your rufus tool should scan and fill in the other prompts automatically.
Step 10: Click the start button to burn the ISO image on your laptop.
Step 11: Your phone is now the bootable device, the rest of the windows installation process is normal like we discussed earlier.
Over to you
Whether your Laptop has no CD/DVD drive, got damaged or you need just stepping up your windows installation skills; the various approaches discussed should cater for your needs. Enjoy your new windows.

Kenny Trinh is a seasoned expert in the field of laptops and technology, boasting an extensive background enriched by years of hands-on experience and in-depth research. With a keen eye for innovation and a passion for staying ahead of the technological curve, Kenny has established himself as a trusted voice in the tech community. Holding a prestigious degree in Computer Science, he combines his academic insights with practical expertise to deliver valuable insights and recommendations to his readers and followers. Through his work, Kenny aims to demystify complex tech concepts, empowering individuals to make informed decisions and optimize their digital experiences.
