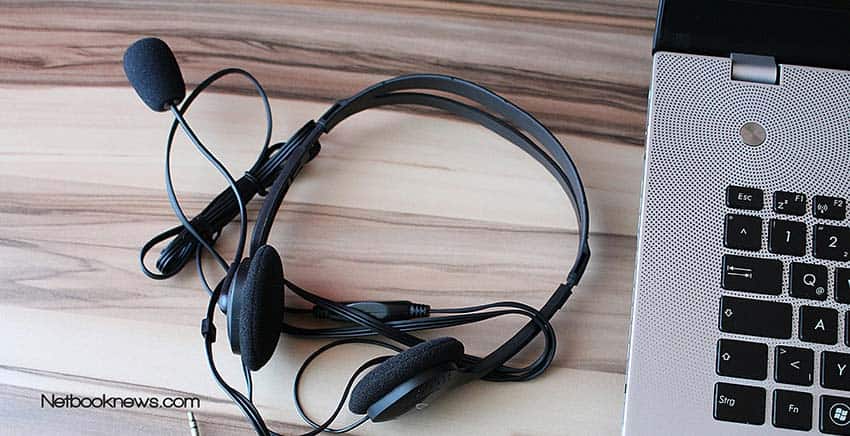
When you purchase a laptop, one in-built feature you should always expect to see is the microphone. However, if you have no need for the microphone, the next thought will be how to block it on your laptop.Basically, if you want to know how to block the microphone on your laptop, go to any of these applications on your PC.
It is important to note that blocking the microphone on your laptop can affect the efficiency of your system.
To know the applications making use of your microphone, check your settings
5 Ways to Block The Microphone On Your Windows Laptop
To block the microphone on a Windows Laptop, there are four steps which require you to go to different settings of the system. These sections are:
Device Manager: an applet which allows you to view and control all hardware connected to the laptop. It is an extension of the Microsoft Management Console and gives an organized view of all devices.
BIOS: this is an acronym for basic input/output system. It is pre-installed firmware used for performing initialization of hardware during the boot process.
Control Panel: Another aspect of a Windows operating system which enables the user to view and modify settings of a laptop. It contains applets that allow removal and inclusion of both software and hardware.
Device Properties: easily accessible menu to modify the settings within a laptop. Here you can see the information of a laptop from its name, the hardware and available options for system protection among others.
Settings: from the home page of the laptop, you can navigate to the settings menu and adjust certain features.
Follow these steps to block the microphone on your PC.
Option 1 – Use Device Manager
Using the device manager to block your microphone is pretty easy and takes less than 30 seconds. However, it is not entirely secure.
If you have an advanced virus or malware on your system, it is quite easy for them to turn the microphone back on. Just ensure you have an anti-virus system in place to scan for malware.
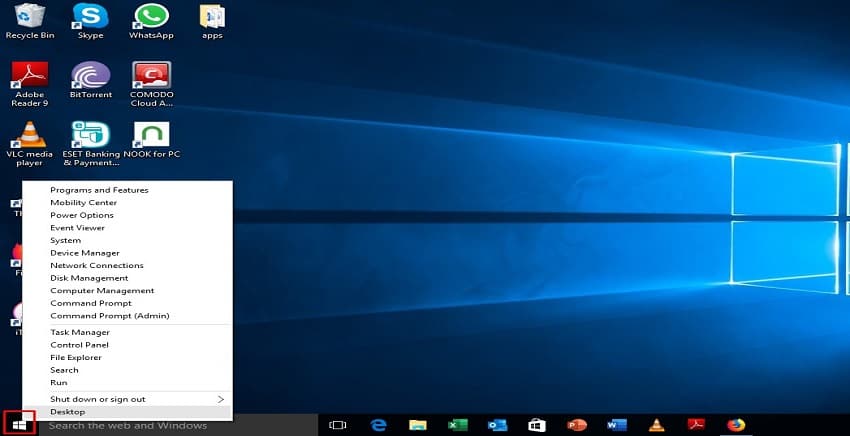
Step 1: Right-click the “Start” button
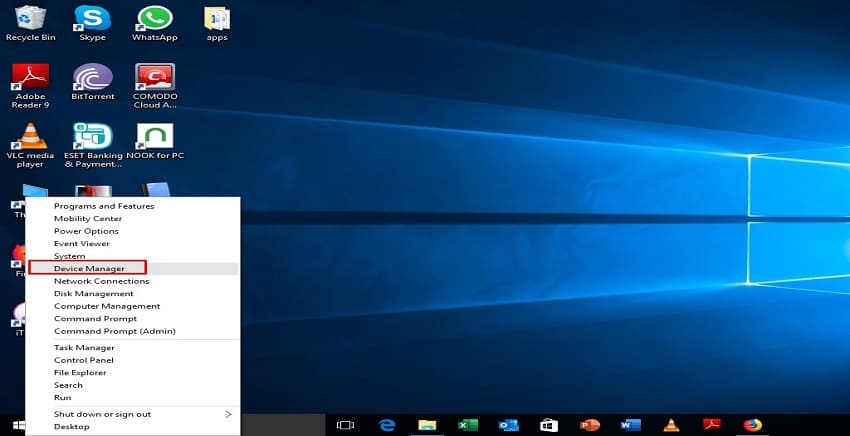
Step 2: Select the “Device Manager” option
Step 3: Wait for the “Device Manager” menu to open up
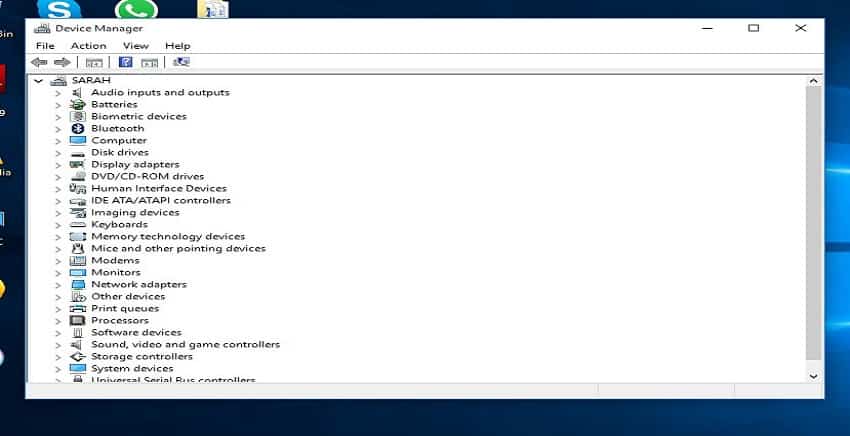
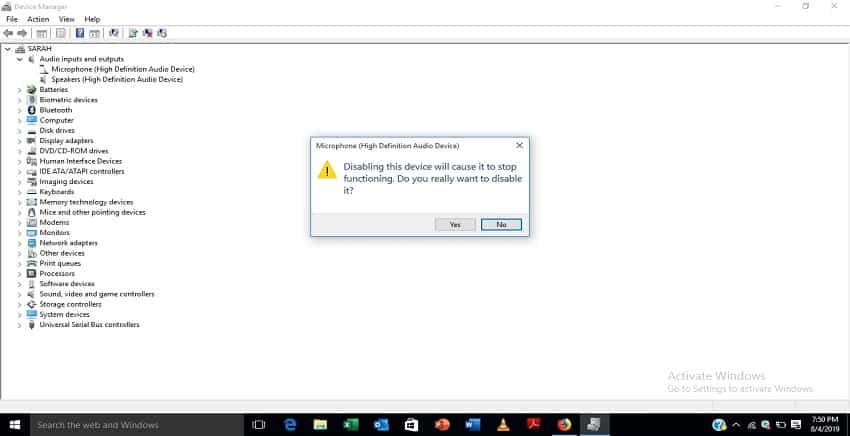
Step 4: Look out for “Audio inputs and outputs”
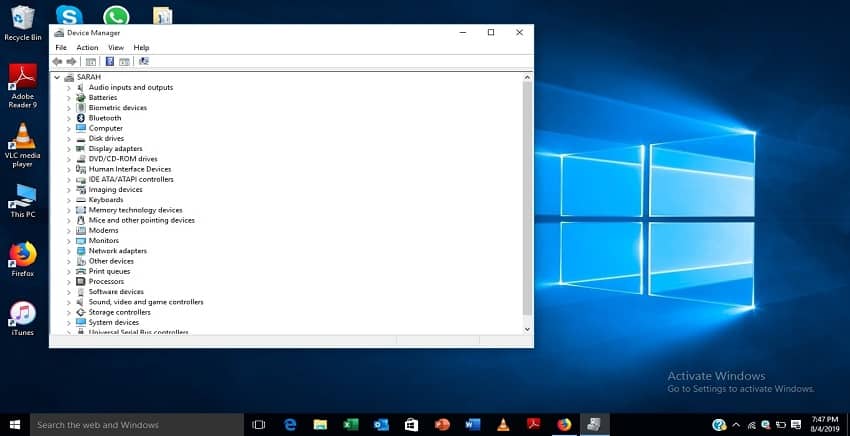
Step 5: Click the “drop-down” arrow
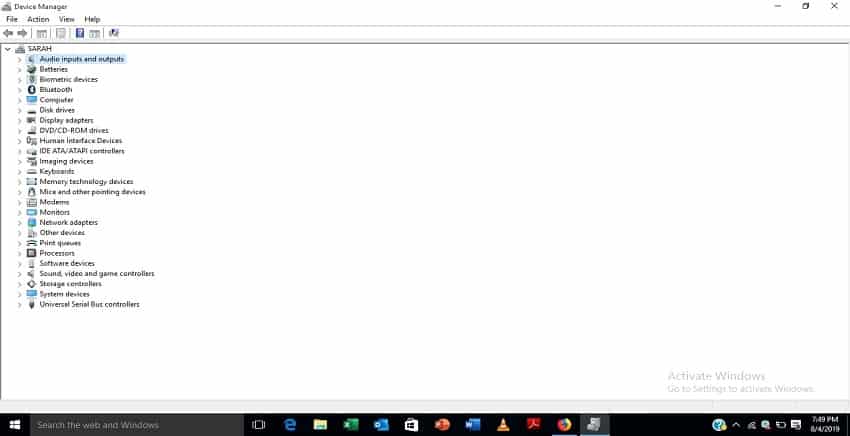
Step 6: Right-click the option for “Microphone”
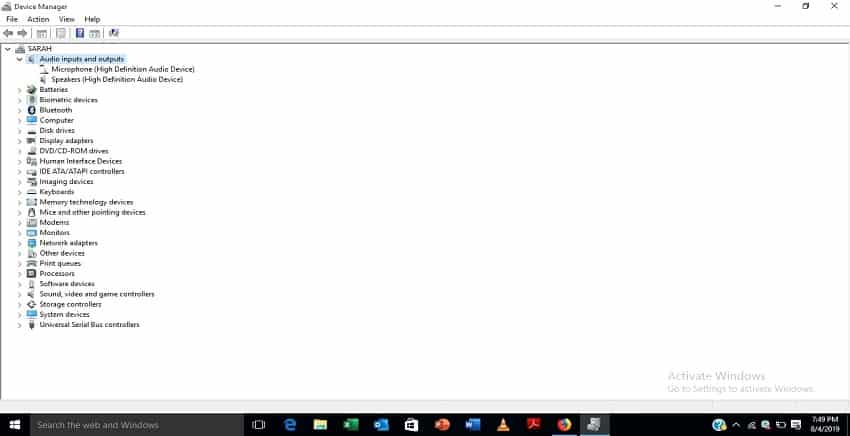
Step 7: Select the “disable” option
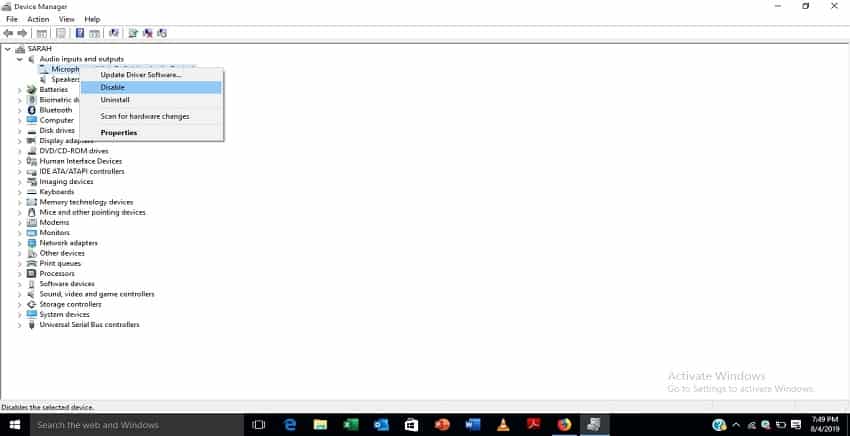
Step 8: You will get a prompt confirming if you want to disable. Select the “Yes” option
Option 2 – Use BIOS
Another avenue to block your microphone is through the use of BIOS. Some laptops have this feature, but the process differs according to the manufacturer of the PC.
With the use of BIOS, what you are basically doing is preventing the booting of the microphone.
Step 1: Go to the “Settings” option in the “Start” menu
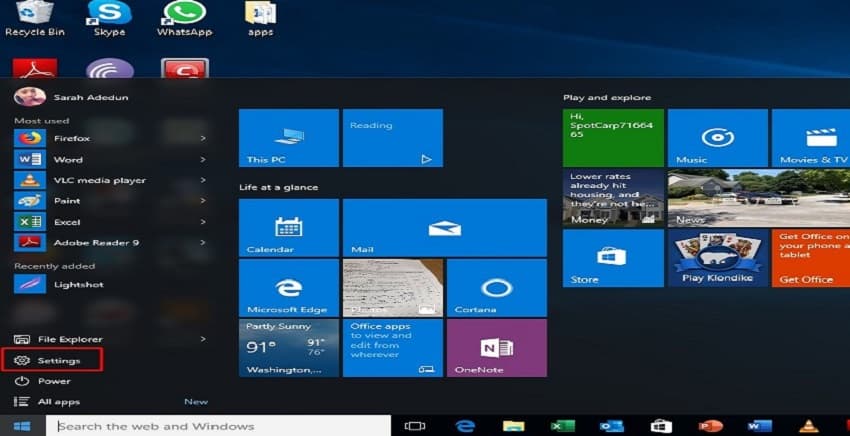
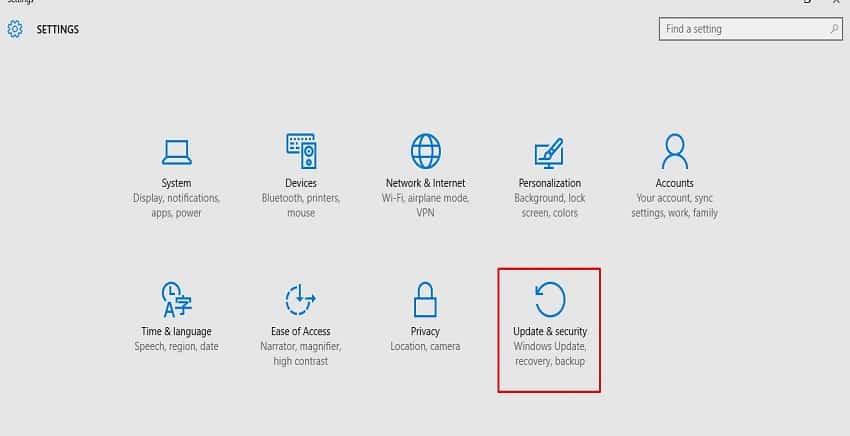
Step 2: Select the option for “Update & Security”
Step 3: Read through the options on your left and select “Recovery”
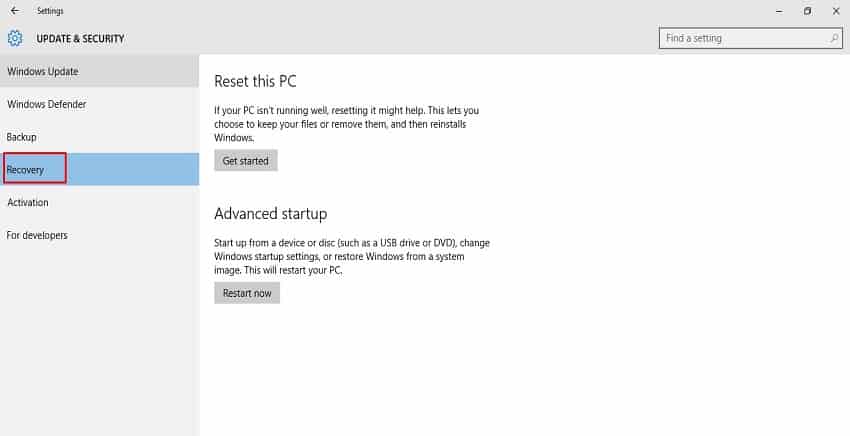
Step 4: You will see a tab open with two sections.
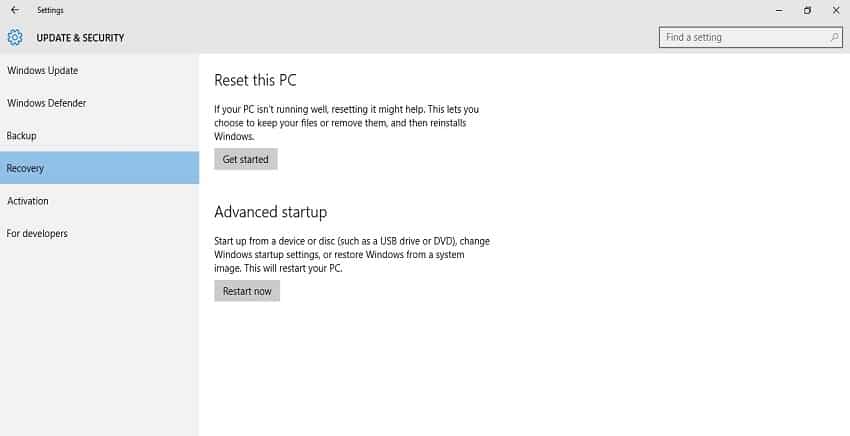
Step 5: Select “Restart Now” under “Advanced Setup”
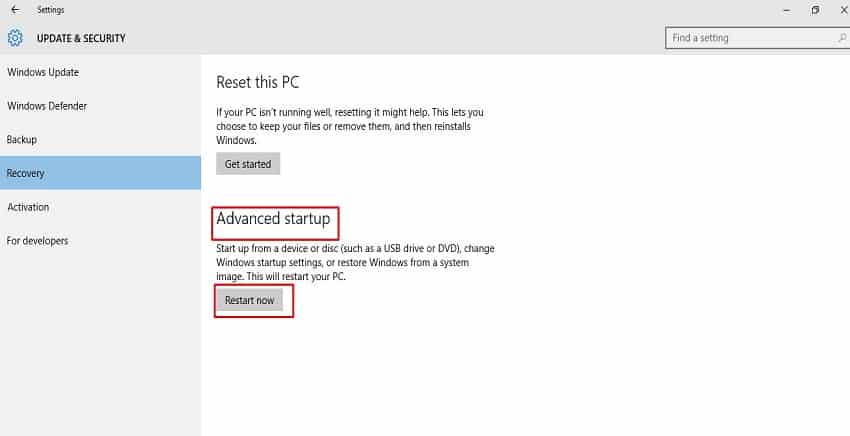
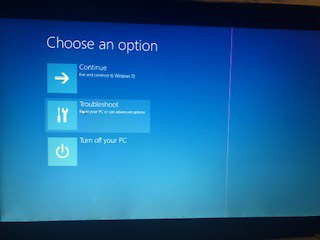
Step 6: A new window will pop up
Step 7: Choose “Troubleshoot”
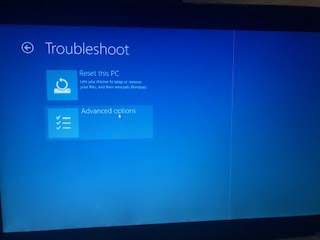
Step 8: Select the “Advanced Options”
Step 9: Select “UEFI Firmware Settings”
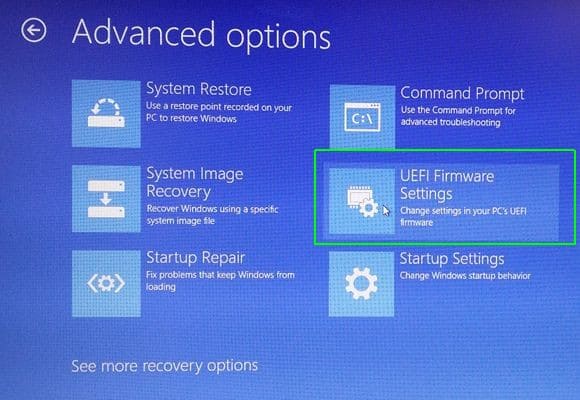
Step 10: Choose “Restart”

Step 11: You will see the “BIOS” menu
Step 12: Go to the “Security” tab
Step 13: Look out for the “I/O Port Access” section
Step 14: Disable the “microphone” using the function key options
Step 15: “Save” and “Exit”
Option 3 – Go to Control Panel
Making use of the Control Panel within your Windows laptop is another means to block the microphone.
Step 1: Go to the “search bar” beside the “Start” menu
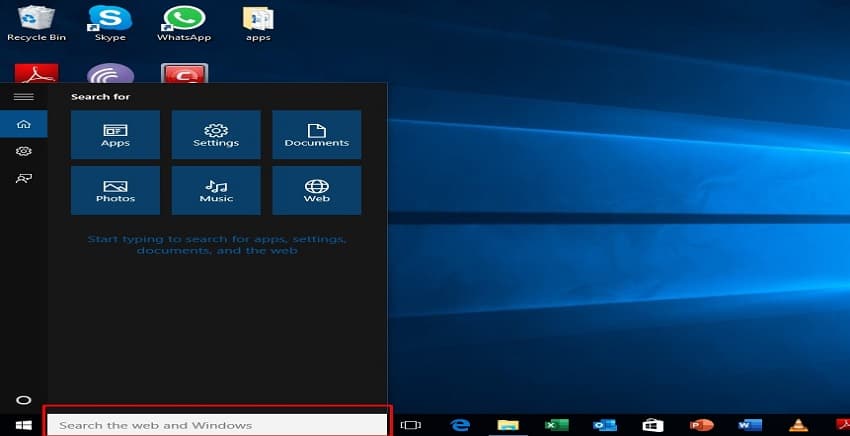
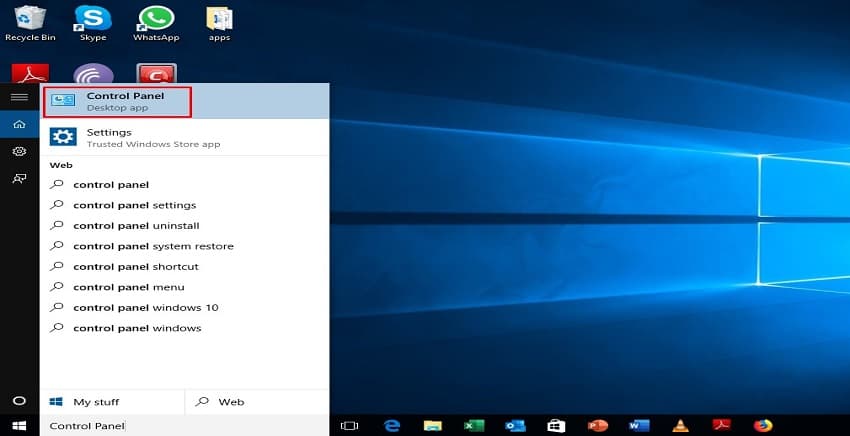
Step 2: Search for “Control Panel”
Step 3: In the search bar for Control Panel, type “Audio”
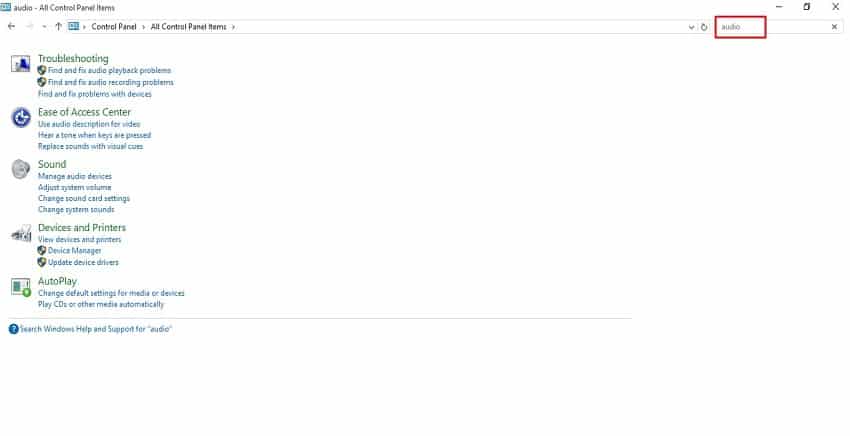
Step 4: Select the “Sound” tab
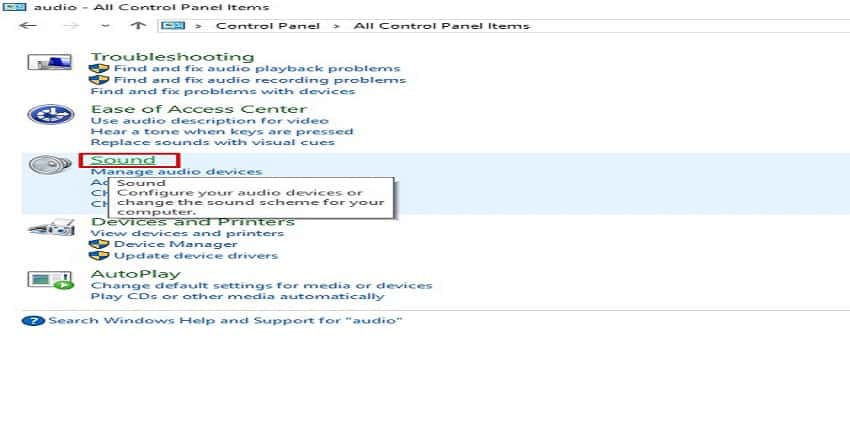
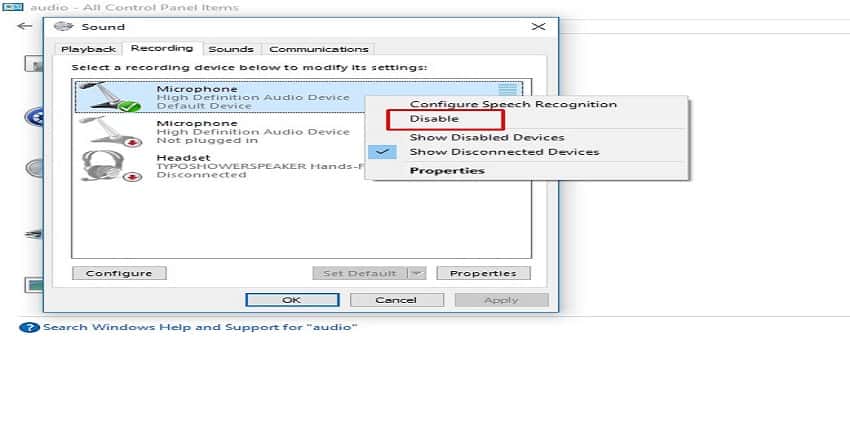
Step 5: Go to the tab for “Recording”
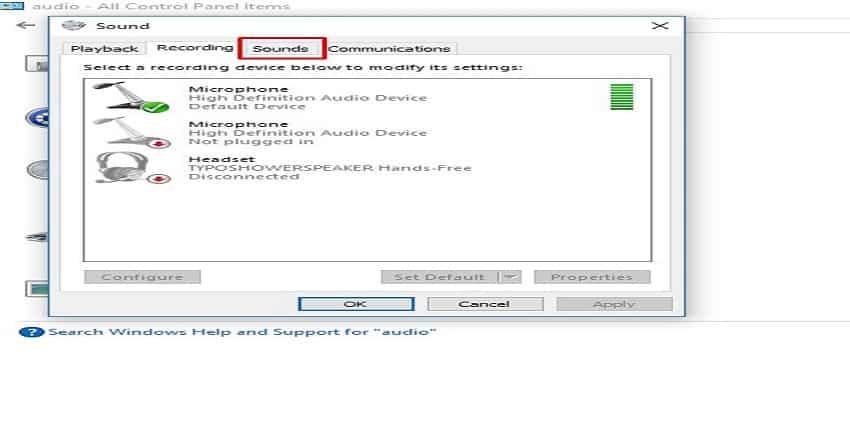
Step 6: Place the cursor on your default mic
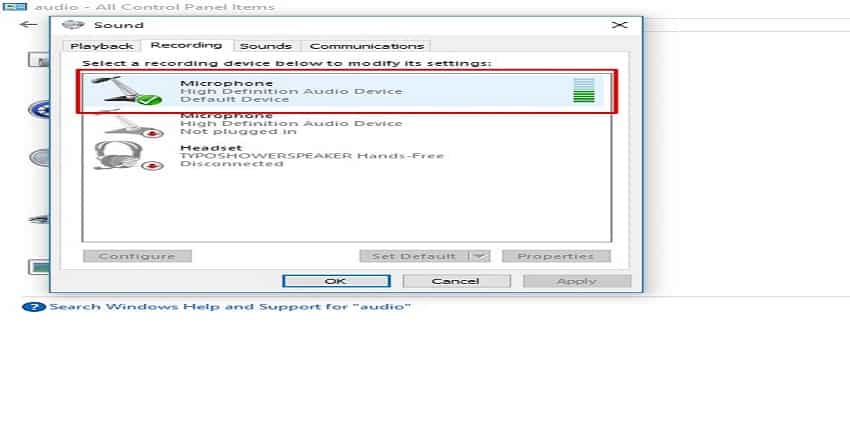
Step 7: Right click it and wait for a menu to pop up
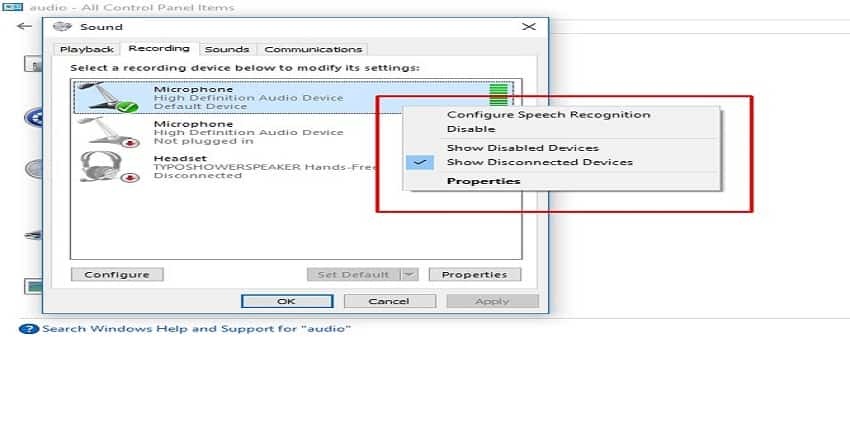
Step 8: Select “Disable”
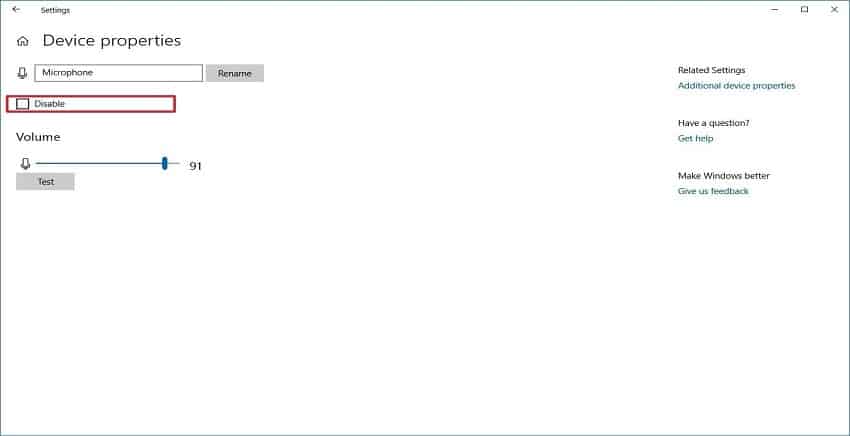
Option 4 – Use Device Properties
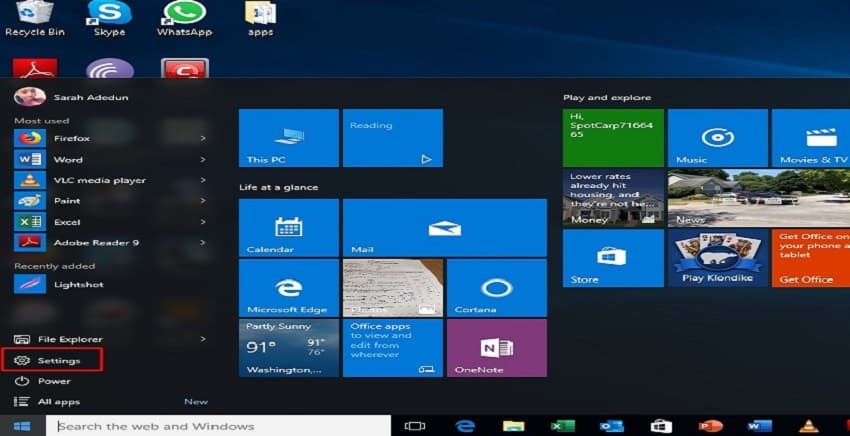
Step 1: Go to the “Settings” option in the “Start” menu
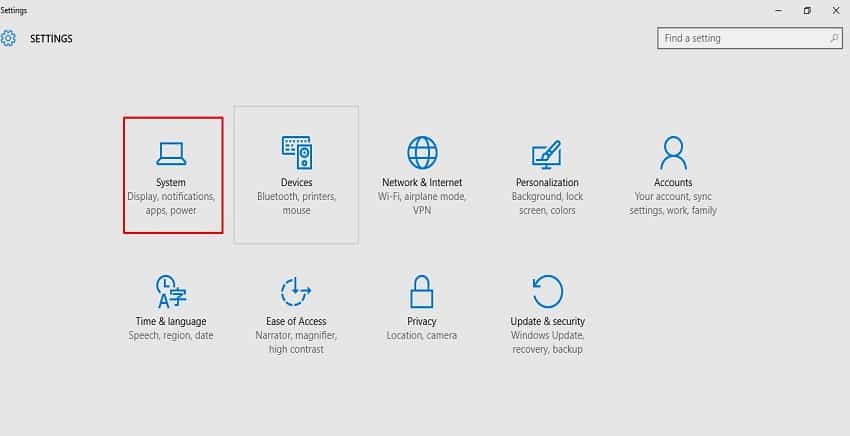
Step 2: Select the “System” option
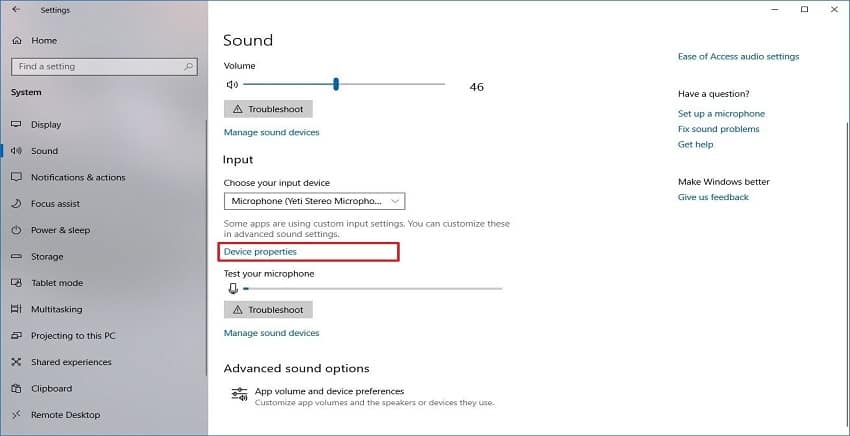
Step 3: Go to “Sound” option on the left side of the window
Step 4: Look at the “Input” section and go to “Device Properties”
Step 5: Select the “Disable” option
Option 5 – Use The Settings
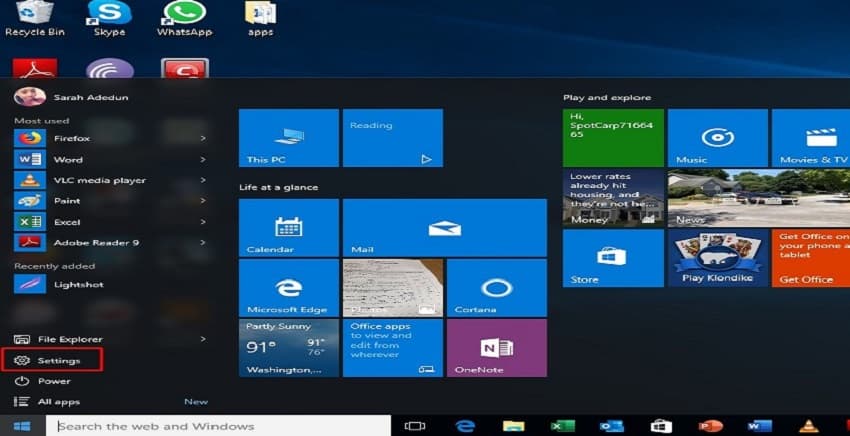
Step 1: Go to the “Settings” option in the “Start” menu
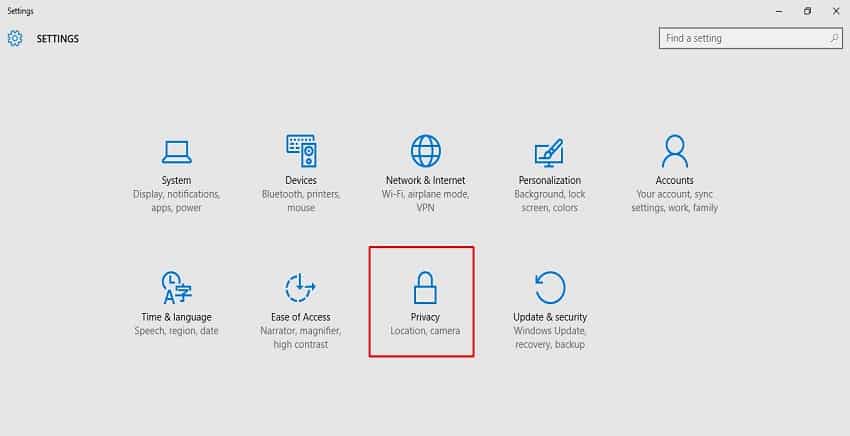
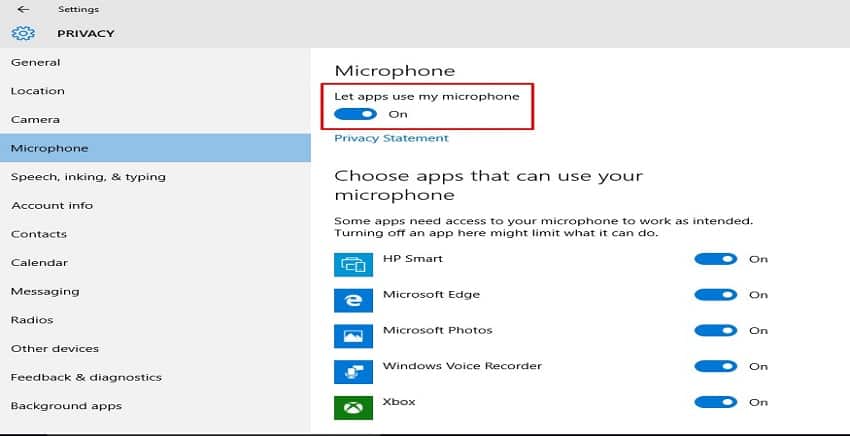
Step 2: Select the “Privacy” option
Step 3: Go to “Microphone”
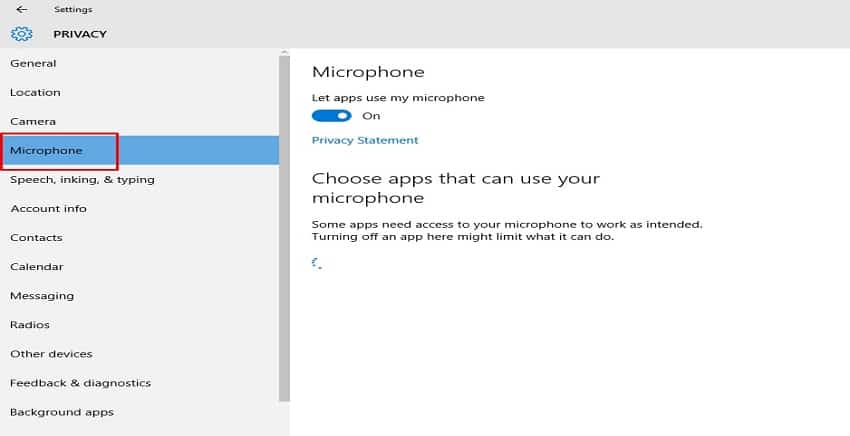
Step 4: Under “Microphone” , turn off the option for “let apps use my microphone”
2 Ways to Block The Microphone On Your Mac Laptop
Use this video or the guide below to block the microphone on your laptop:
Option 6 – Block Internal Audio Input
Step 1: Select the “Apple” menu
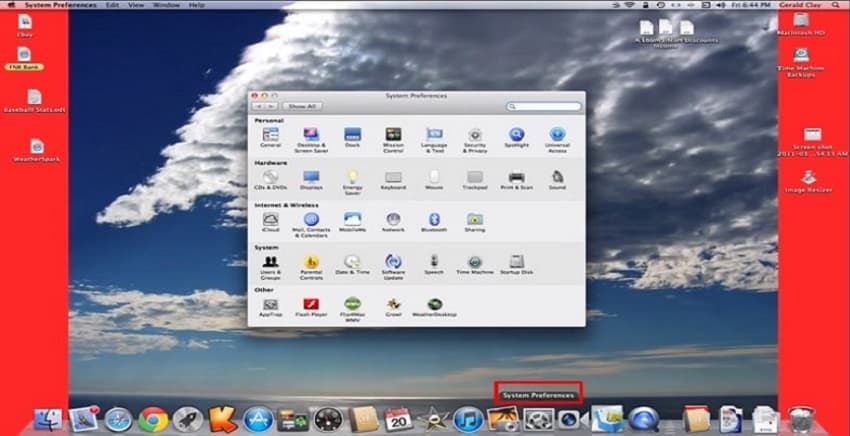
Step 2: Go to “System Preferences”
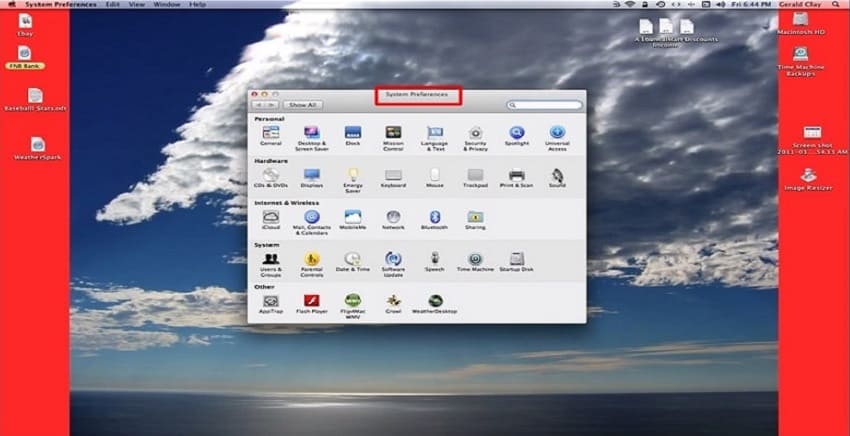
Step 3: Place your cursor at the search bar and type “Sound”
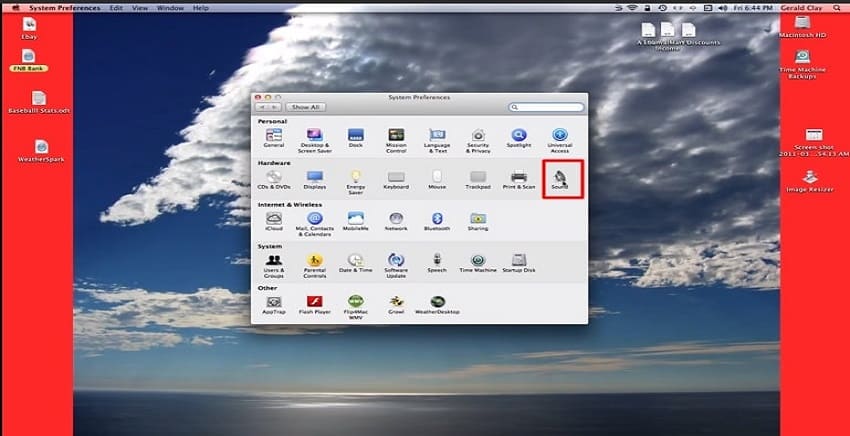
Step 4: A menu for “Sound” should popup
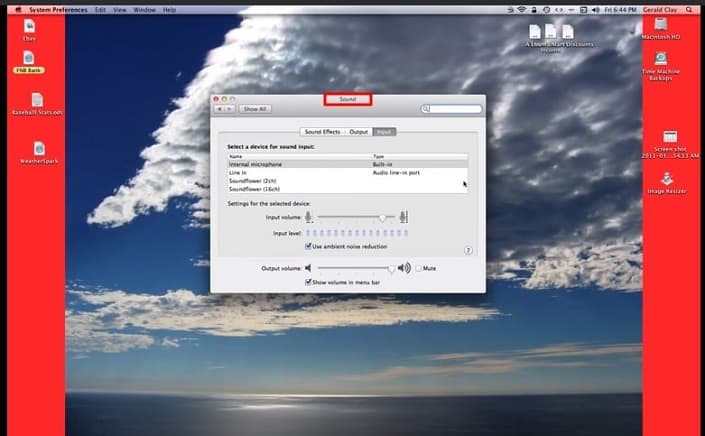
Step 5: Search for the tab which reads “Input”
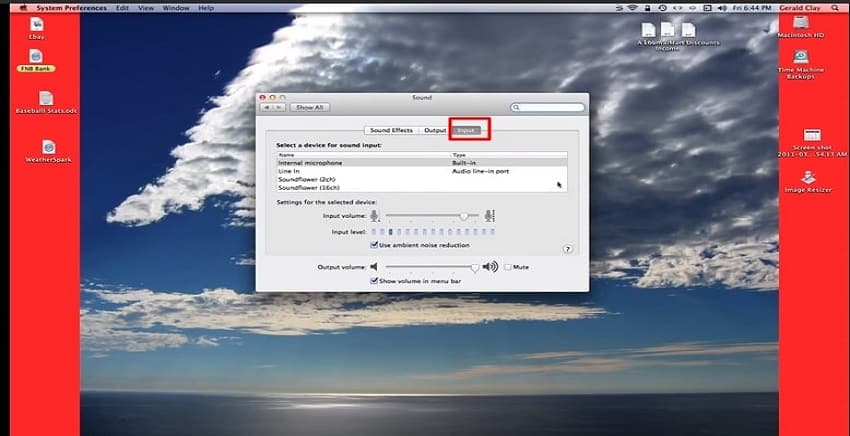
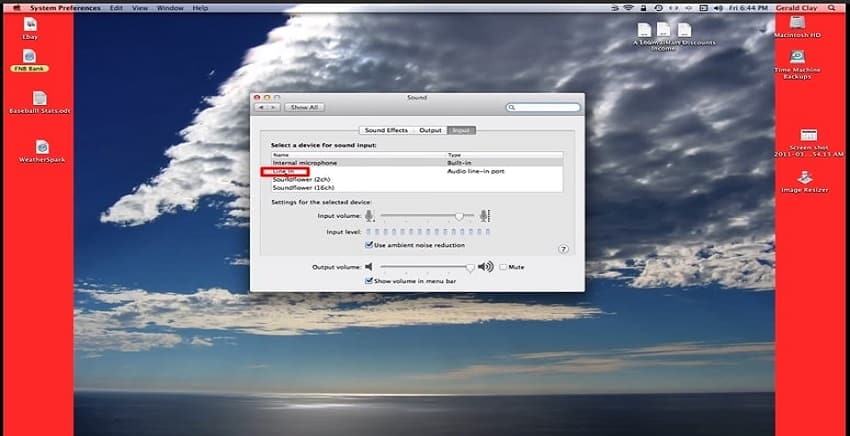
Step 6: Click “Line-in”
Option 7 – Mute the Microphone
Step 1: Select the “Apple” menu
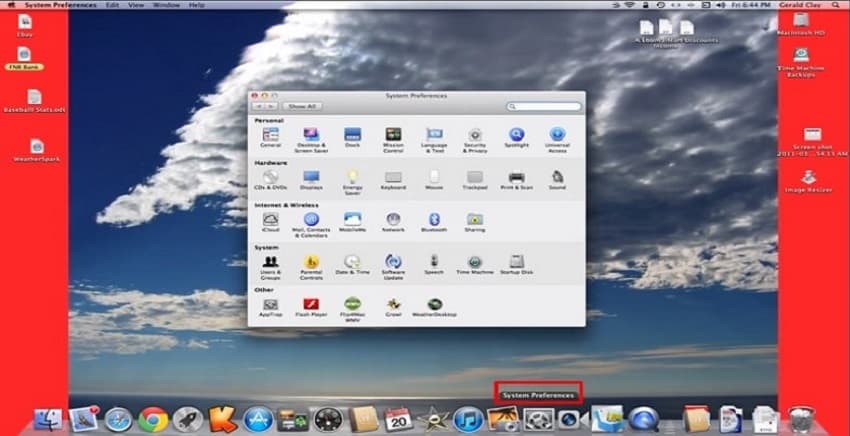
Step 2: Go to “System Preferences”
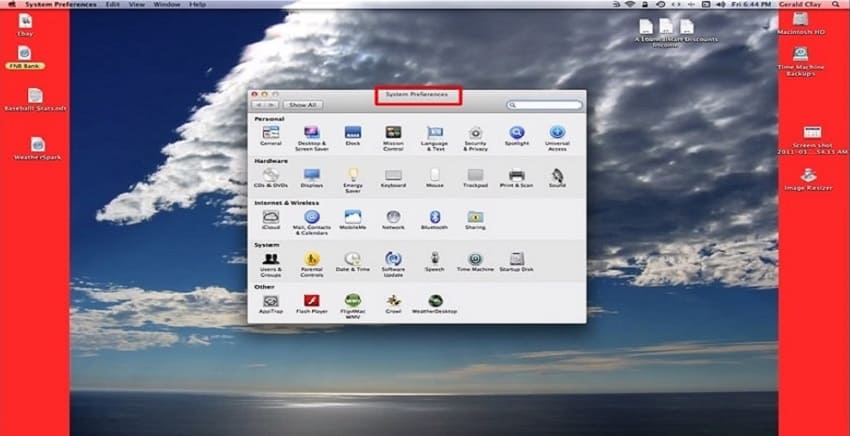
Step 3: Place your cursor at the search bar and type “Sound”
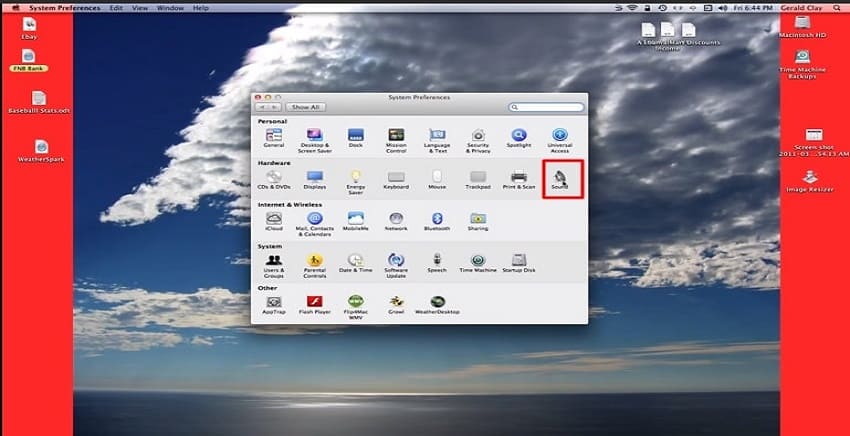
Step 4: A menu for “Sound” should popup
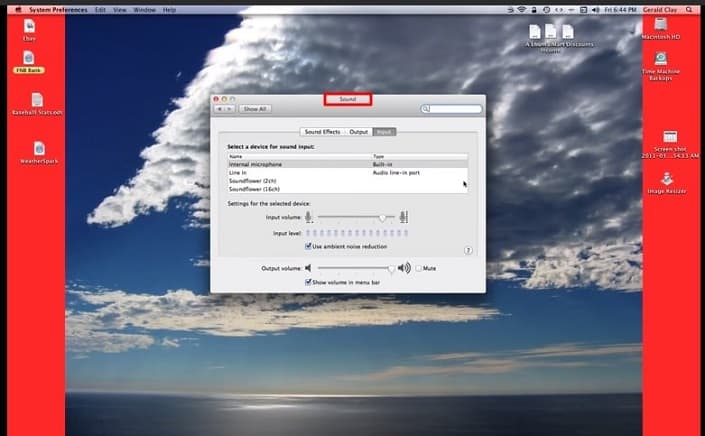
Step 5: Search for the tab which reads “Input”
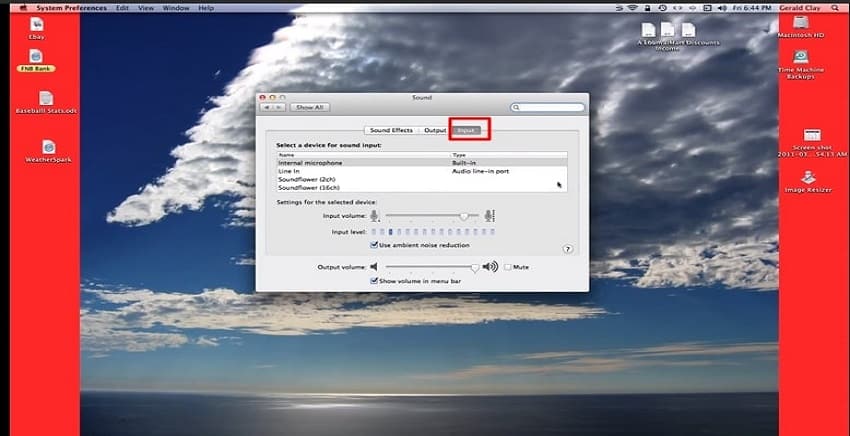
Step 6: Click “Internal Microphone”
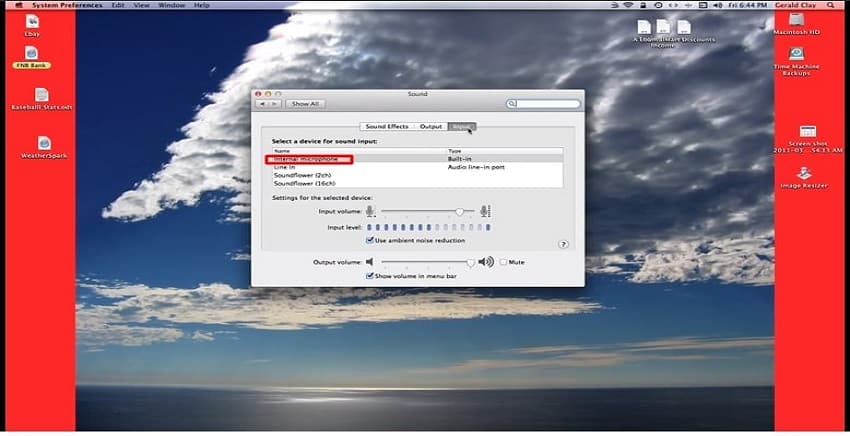
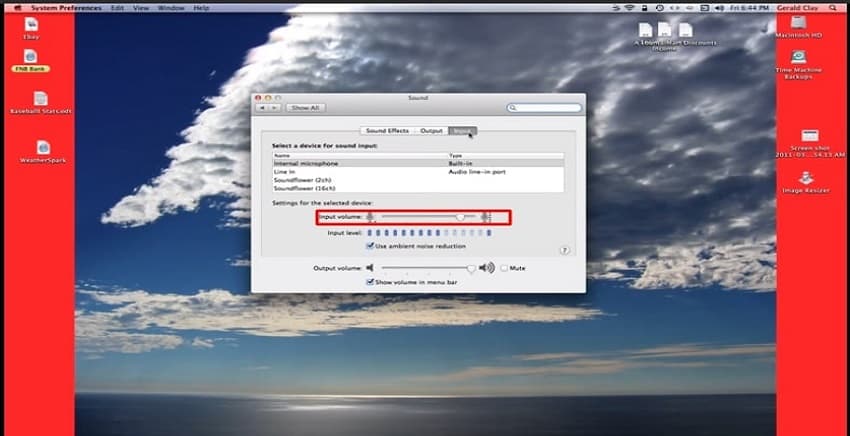
Step 7: Drag the “Input Volume” slider to mute
Can I Turn Off Access To The Microphone On a Browser?
Yes, you can block browsers from accessing your microphone. Web browsers such as Chrome, Internet Explorer and Mozilla Firefox allow you to adjust permissions for websites you visit.
All you have to do to block the access to the microphone of your laptop on these sites is go to the settings and disable.
Mute vs. Disable Microphone
There are different reasons why you might want to block a microphone on your system. They include:
- To prevent hacking
- To prevent eavesdropping
- You have no use for it
But, even with the best intentions for turning off your microphone, it can affect how the laptop works. Some applications need the microphone to effectively function. They include the voice/video-calling applications as well as games.
Conclusion
Blocking the microphone of your PC ensures that you can maintain your privacy. With any of the five methods stated above, you can complete the blocking action in less than a minute. However, if you want to enable the microphone again, all you have to do is follow the same steps to reactivate.

Kenny Trinh is a seasoned expert in the field of laptops and technology, boasting an extensive background enriched by years of hands-on experience and in-depth research. With a keen eye for innovation and a passion for staying ahead of the technological curve, Kenny has established himself as a trusted voice in the tech community. Holding a prestigious degree in Computer Science, he combines his academic insights with practical expertise to deliver valuable insights and recommendations to his readers and followers. Through his work, Kenny aims to demystify complex tech concepts, empowering individuals to make informed decisions and optimize their digital experiences.
